

Share
Introduction
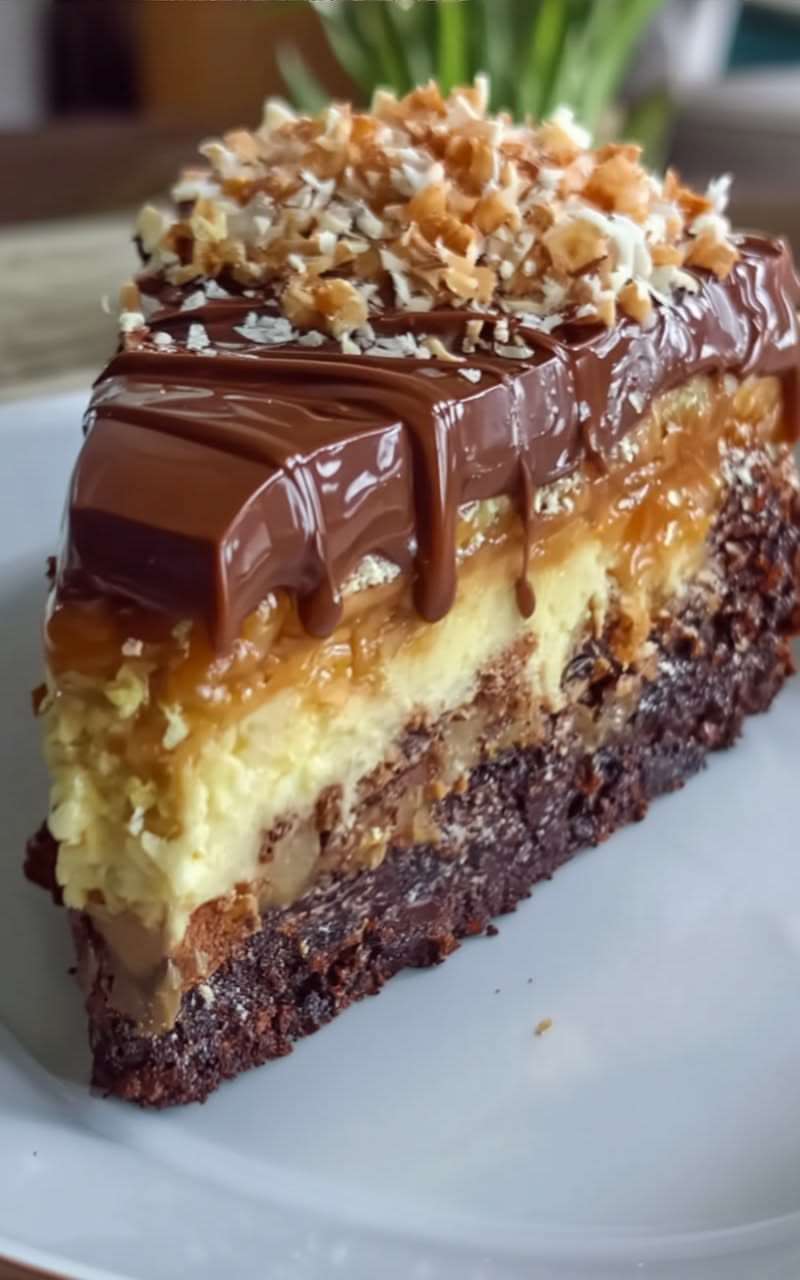
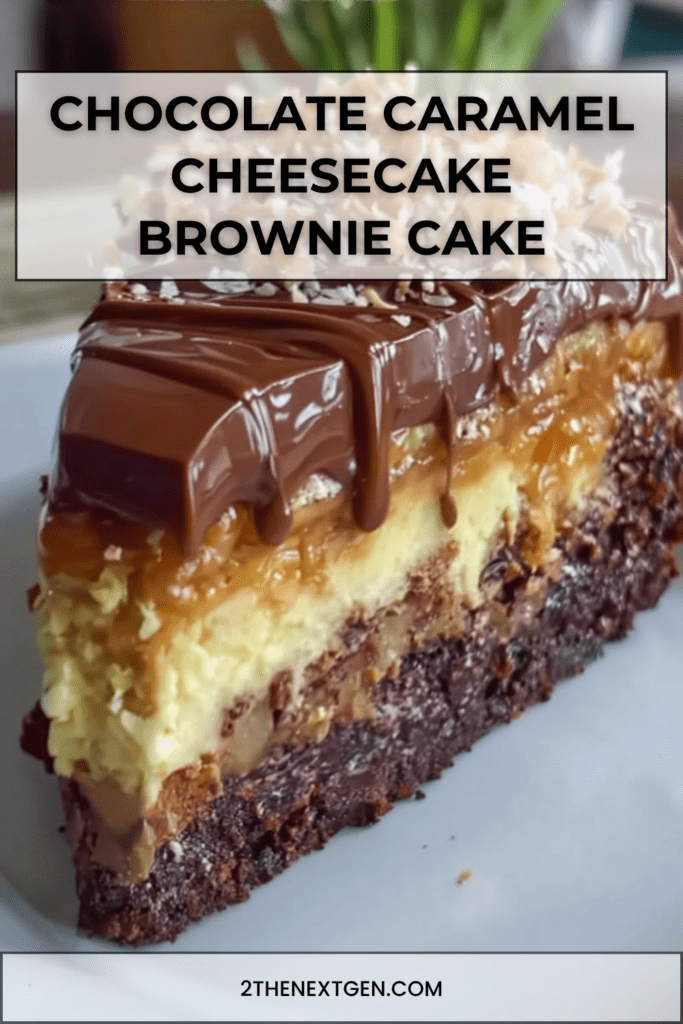
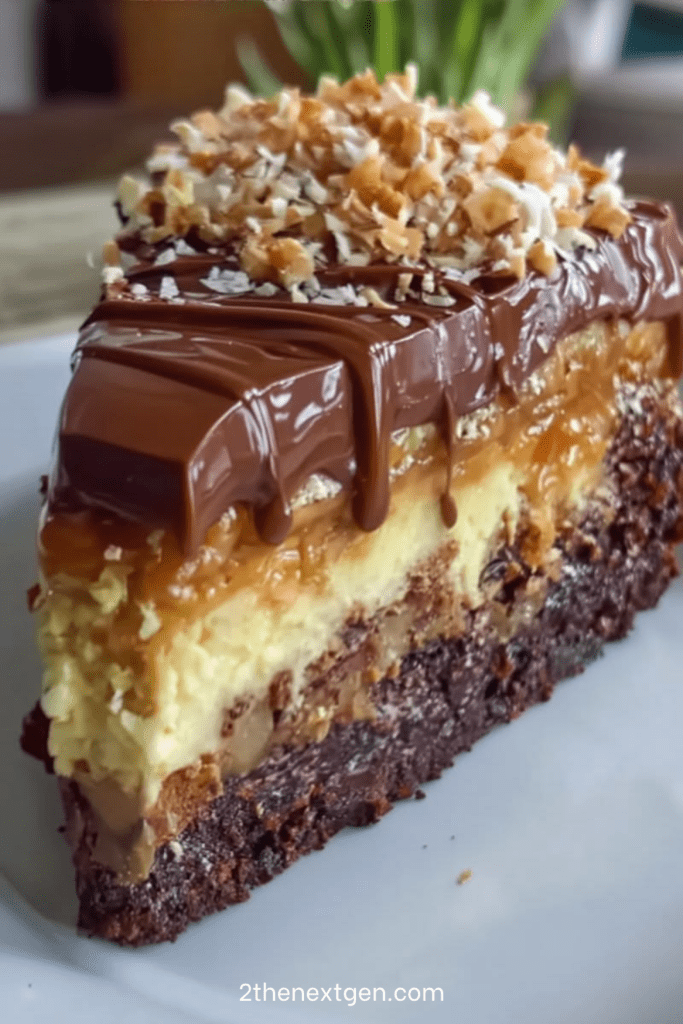
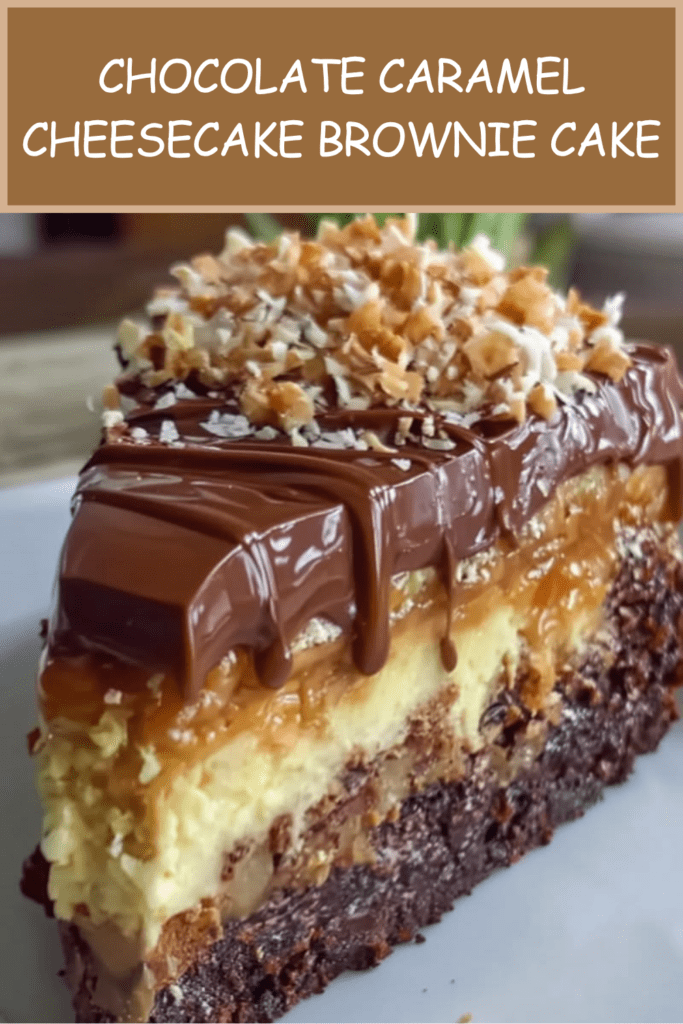
Chocolate Caramel Cheesecake Brownie Cake is a rich, creamy, and indulgent dessert made with a fudgy brownie base, smooth cheesecake layer, sweet caramel topping, glossy chocolate ganache, and crunchy nuts. It combines three favorite desserts in one beautiful cake: brownies, cheesecake, and chocolate caramel cake.
This recipe is perfect for birthdays, family celebrations, holidays, dinner parties, or any occasion when you want a dessert that looks impressive and tastes unforgettable. The brownie base is dense and chocolatey, the cheesecake layer is creamy and soft, the caramel adds sweetness and richness, and the ganache gives the cake a smooth, elegant finish.
Moreover, this cake is ideal for making ahead. Since it needs time to chill, the texture becomes better after resting in the refrigerator. The layers firm up, the flavors blend together, and the slices become cleaner. As a result, it is a practical dessert for entertaining because you can prepare it in advance and decorate it before serving.
In addition, this chocolate caramel cheesecake brownie cake is easy to customize. You can use dark chocolate for a deeper flavor, milk chocolate for a sweeter taste, salted caramel for balance, or toasted nuts for extra crunch. Therefore, if you love rich chocolate desserts, creamy cheesecake, and caramel toppings, this recipe is a perfect choice.
History and Information About Cheesecake Brownie Cakes
Cheesecake brownie cakes are inspired by two classic desserts: brownies and cheesecake. Brownies are known for their dense, fudgy texture and deep chocolate flavor, while cheesecake is loved for its creamy, smooth, and slightly tangy filling. When combined, they create a dessert that feels rich, balanced, and satisfying.
The brownie base in this recipe is made with melted dark chocolate, butter, sugar, eggs, vanilla, flour, cocoa powder, and salt. This creates a thick chocolate layer that stays fudgy even after baking. Since the brownie base is baked only briefly before the cheesecake layer is added, it remains soft and rich.
The cheesecake layer adds contrast. Cream cheese gives it a smooth and tangy flavor, while eggs help it set. Heavy cream or sour cream makes the texture softer, and cornstarch helps stabilize the filling. Baking the cheesecake gently at a lower temperature helps keep it creamy and prevents cracking.
Caramel is a classic partner for both chocolate and cheesecake. It adds sweetness, warmth, and a buttery flavor. A small pinch of sea salt can turn the caramel into salted caramel, which balances the sweetness beautifully.
Finally, the chocolate ganache creates a glossy topping. Ganache is made by pouring hot cream over chopped chocolate and stirring until smooth. Adding butter makes it even shinier. Once poured over the caramel layer, it creates a luxurious finish that makes the cake look bakery-style.
Today, chocolate caramel cheesecake brownie cake is a popular celebration dessert because it combines multiple textures and flavors in one slice: fudgy, creamy, sticky, glossy, and crunchy.
Ingredients
For the Brownie Base
- 180 g dark chocolate, chopped
- 120 g butter
- 150 g sugar
- 2 eggs
- 1 teaspoon vanilla extract
- 80 g all-purpose flour
- 25 g cocoa powder
- 1 pinch of salt
- 80 g chopped walnuts or pecans, optional
For the Cheesecake Layer
- 450 g cream cheese, softened
- 100 g sugar
- 2 eggs
- 120 ml heavy cream or sour cream
- 1 teaspoon vanilla extract
- 1 tablespoon cornstarch
For the Caramel Layer
- 180 g caramel sauce
- 1 pinch of sea salt, optional
For the Chocolate Ganache
- 180 g milk chocolate or dark chocolate, chopped
- 150 ml heavy cream
- 1 tablespoon butter, optional, for shine
For Decoration
- Chopped nuts
- Shredded coconut, optional
- Extra caramel sauce, optional
Preparation Step by Step
Step 1: Prepare the Oven and Pan
First, preheat the oven to 175°C / 350°F. Line a springform pan with parchment paper.
A springform pan is the best choice for this recipe because it makes unmolding easier after the cake has chilled. Since this dessert has several layers, removing it from a regular pan can be difficult.
Grease the sides lightly if needed, then set the pan aside while preparing the brownie base.
Step 2: Melt the Chocolate and Butter
Place the chopped dark chocolate and butter in a heatproof bowl.
Melt them gently over a double boiler or in the microwave in short intervals. Stir often until the mixture becomes smooth, glossy, and fully melted.
Let the melted chocolate cool slightly before adding it to the eggs. This prevents the heat from affecting the texture of the batter.
Step 3: Whisk the Eggs, Sugar, and Vanilla
In a large bowl, whisk the eggs, sugar, and vanilla extract until glossy.
This step helps create a smoother brownie texture and gives the base a slightly shiny finish. The sugar also begins to dissolve, which improves the final crumb.
You do not need to whip the mixture for a long time. Just whisk until it looks smooth and slightly lighter.
Step 4: Add the Melted Chocolate
Pour the slightly cooled melted chocolate and butter mixture into the egg mixture.
Mix until fully combined. The batter should look thick, dark, and glossy.
At this stage, the brownie base already has a rich chocolate flavor because it uses both melted chocolate and cocoa powder.
Step 5: Add the Dry Ingredients
Sift in the all-purpose flour, cocoa powder, and salt.
Fold gently with a spatula until just combined. Do not overmix, because overmixing can make the brownie base less fudgy.
The flour gives structure, the cocoa powder deepens the chocolate flavor, and the salt balances the sweetness.
Step 6: Add the Nuts
Add the chopped walnuts or pecans if using.
Fold them gently into the brownie batter. Nuts add crunch and a toasted flavor that pairs beautifully with chocolate, caramel, and cheesecake.
If you want an even deeper flavor, toast the nuts before adding them. Let them cool first, then fold them into the batter.
Step 7: Bake the Brownie Base
Pour the brownie batter into the prepared springform pan and spread it evenly.
Bake for 15 minutes only, just to set the base slightly. The brownie should not be fully baked at this stage because it will continue baking with the cheesecake layer.
Remove the pan from the oven and let the brownie base cool for about 10 minutes.
Step 8: Lower the Oven Temperature
Reduce the oven temperature to 160°C / 320°F.
Cheesecake needs gentler heat than brownies. A lower temperature helps the cheesecake layer bake evenly and stay creamy without drying out.
While the brownie base cools slightly, prepare the cheesecake filling.
Step 9: Beat the Cream Cheese and Sugar
In a large bowl, beat the softened cream cheese with the sugar until smooth and creamy.
Room-temperature cream cheese is important because it blends more easily and prevents lumps. If the cream cheese is too cold, the filling may not become silky.
Mix only until smooth. Avoid beating too much air into the filling, because too much air can cause cracks while baking.
Step 10: Add the Eggs
Add the eggs one at a time, mixing gently after each addition.
Eggs help the cheesecake set, but overmixing after adding them can make the texture less smooth. Mix slowly and scrape the sides of the bowl if needed.
The filling should look creamy, thick, and even.
Step 11: Add Cream, Vanilla, and Cornstarch
Add the heavy cream or sour cream, vanilla extract, and cornstarch.
Mix gently until smooth. Heavy cream gives richness, while sour cream adds a slight tang. Cornstarch helps stabilize the cheesecake layer and makes it easier to slice cleanly.
The filling should be pourable but still thick and creamy.
Step 12: Pour the Cheesecake Layer
Pour the cheesecake mixture over the partially baked brownie base.
Smooth the top with a spatula. Try to spread the filling evenly so the cake bakes with a level surface.
Be gentle so the brownie base stays in place underneath.
Step 13: Bake the Cheesecake
Bake at 160°C / 320°F for 30 to 35 minutes.
The edges should be set, while the center should still be slightly wobbly. This is important because cheesecake continues to firm up as it cools.
Do not overbake. Overbaking can make the cheesecake dry or cracked instead of creamy.
Step 14: Cool the Cake Completely
Remove the cake from the oven and let it cool completely at room temperature.
Cooling slowly helps protect the cheesecake texture. Do not add the caramel layer while the cake is warm, because the caramel can become too runny.
Once cooled, refrigerate the cake for at least 4 hours so the layers become firm and stable.
Step 15: Add the Caramel Layer
Once the cheesecake is fully chilled, spread the caramel sauce over the top.
Use a spatula or spoon to create an even layer. If you want a salted caramel flavor, sprinkle a small pinch of sea salt over the caramel.
Place the cake back in the refrigerator while preparing the chocolate ganache. This helps the caramel stay in place.
Step 16: Make the Chocolate Ganache
Heat the heavy cream until hot but not boiling.
Pour the hot cream over the chopped chocolate and let it sit for 2 minutes. Then, stir until smooth and glossy.
Add butter if using for extra shine. Let the ganache cool slightly before pouring it over the caramel layer. It should be pourable but not too hot.
Step 17: Pour the Ganache
Pour the chocolate ganache over the caramel layer.
Spread it gently with a spatula. Work carefully so the caramel layer stays smooth underneath.
The ganache will create a rich, glossy chocolate topping that makes the cake look elegant and indulgent.
Step 18: Decorate the Cake
Sprinkle chopped nuts over the ganache.
Add shredded coconut if desired, then drizzle with extra caramel sauce for a beautiful finish.
For extra crunch, you can add toasted pecans or hazelnuts between the caramel and ganache layers. This gives each slice a more interesting texture.
Step 19: Chill to Set the Ganache
Refrigerate the cake for about 30 minutes to set the ganache.
This final chilling step makes the top firm enough to slice cleanly while keeping the inside creamy and fudgy.
If you have time, chill the cake longer for even cleaner layers.
Step 20: Slice and Serve
Slice the cake with a warm knife for clean layers.
Dip the knife in hot water, wipe it dry, and cut each slice carefully. Wipe the knife between cuts for the neatest presentation.
Serve the cake cold. Each slice should show the brownie base, cheesecake layer, caramel layer, and ganache topping.
Nutritional Information
The following nutritional values are approximate and may vary depending on the chocolate, caramel sauce, cream cheese, nuts, and slice size used.
For one slice, based on 10 slices:
Calories: approximately 520 to 720 kcal
Protein: approximately 9 g
Carbohydrates: approximately 52 g
Fat: approximately 34 to 50 g
Sugar: approximately 38 g
Fiber: approximately 3 g
Sodium: varies depending on cream cheese, caramel sauce, butter, and added salt
Chocolate caramel cheesecake brownie cake is a rich dessert with chocolate, butter, cream cheese, caramel, ganache, and optional nuts. It is indulgent and best served in moderate slices.
To make the cake slightly lighter, cut smaller slices, use dark chocolate, and reduce the extra caramel drizzle. To make it richer, add toasted nuts, extra ganache, or salted caramel.
FAQ
Can I Make This Cake Ahead of Time?
Yes, this cake is perfect for making ahead. It needs chilling time, and the flavor improves as the layers set in the refrigerator.
Why Is the Brownie Base Baked First?
The brownie base is baked briefly to set it slightly before the cheesecake layer is added. This helps create clean layers while keeping the brownie fudgy.
Can I Use Milk Chocolate Instead of Dark Chocolate?
Yes, milk chocolate can be used for a sweeter flavor. Dark chocolate gives a deeper and more intense chocolate taste.
How Do I Prevent Cheesecake Cracks?
Do not overmix the filling after adding the eggs, and do not overbake. The center should still be slightly wobbly when removed from the oven.
Can I Use Salted Caramel?
Yes, salted caramel works beautifully in this recipe. You can use salted caramel sauce or add a pinch of sea salt to regular caramel.
Can I Add Nuts to the Brownie Base?
Yes, walnuts, pecans, or hazelnuts are excellent additions. They add crunch and pair well with chocolate and caramel.
Can I Freeze This Cake?
You can freeze the cake, but the texture of the cheesecake and ganache may change slightly after thawing. For best results, serve it fresh from the refrigerator.
How Long Should the Cake Chill?
The cake should chill for at least 4 hours. Overnight chilling gives the cleanest slices and the best texture.
How Do I Store Leftovers?
Store leftovers covered in the refrigerator for up to 4 days. Keep the cake chilled because it contains cheesecake and ganache.
What Can I Serve with This Cake?
Serve it with coffee, tea, vanilla ice cream, whipped cream, fresh berries, or extra caramel sauce for a more indulgent dessert.
Conclusion
Chocolate Caramel Cheesecake Brownie Cake is a rich and impressive dessert with a fudgy brownie base, creamy cheesecake layer, sweet caramel topping, glossy chocolate ganache, and crunchy nuts. It is perfect for celebrations, holidays, birthdays, and special family desserts.
The key to the best result is to bake the brownie base briefly, mix the cheesecake gently, chill the cake fully, and let each layer cool or set before adding the next. As a result, every slice has clean layers and a beautiful balance of textures.
Serve this cake cold with extra caramel sauce, chopped nuts, or whipped cream. Fudgy, creamy, chocolatey, and indulgent, this dessert is a true treat for chocolate and caramel lovers.
Check also:
Lemon Chicken Ricotta Meatballs
Chicken and meat easy Recipes
Suggestions:
- Crispy Garlic Parmesan Fries Baked to Golden Perfection
- Creamy Tomato and Roasted Red Pepper Fusilli Recipe
- Juicy Grilled Beef Kofta Recipe with Creamy Yogurt Sauce
- Easy Ground Beef Fried Rice with Mixed Vegetables Recipe
- Moist Date and Walnut Loaf with Honey Glaze Recipe