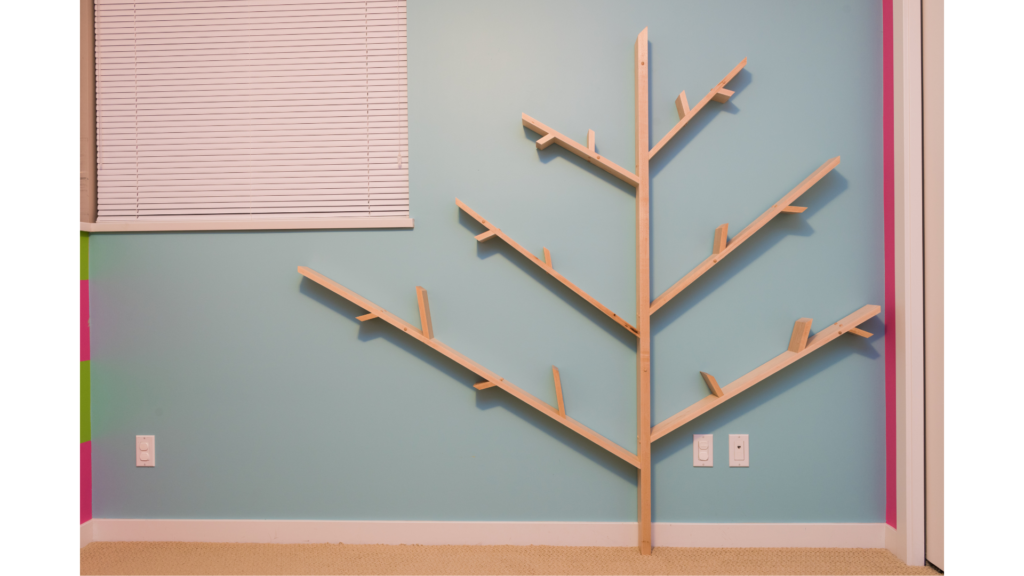
Have you ever walked into a room and thought, “This space needs a personal touch”? One of the best ways to add character and functionality to your home is by building your DIY Bookshelf. Not only does it provide a place for your books, photos, and cherished items, but it also gives you a chance to express your style and creativity. Plus, there’s something incredibly satisfying about completing a DIY project and seeing your handiwork in action.
Choosing the Design – DIY Bookshelf

Consider Your Space
Before diving into the project, it’s crucial to consider where your bookshelf will go. I remember when I built my first bookshelf; I didn’t measure the space properly, and the bookshelf ended up being too large for the intended spot. It was a frustrating lesson in the importance of measurements!
Measure twice, cut once—that’s my golden rule. Measure the height, width, and depth of the space where you want the bookshelf. Don’t forget to think about the room’s overall style and how the bookshelf will fit with your existing décor.
Design Styles
Now comes the fun part: choosing a design! Here are a few styles to consider:
- Minimalist: Clean lines and open shelves are perfect for a modern look. If you’re into a no-fuss, sleek design, this might be your style. I’ve built a minimalist bookshelf for a friend that only had a few floating shelves. It was simple but elegant.
- Industrial: Think exposed metal pipes and reclaimed wood. This style is great if you’re looking for something a bit more rugged and trendy. I once used old copper pipes for the frame of a bookshelf, and it added a unique touch to my loft.
- Traditional: Classic wooden shelves with detailed moldings. If you prefer a more classic look, this style might appeal to you. My grandmother had a beautiful wooden bookshelf with intricate carvings, and it’s always been a source of inspiration for me.
- Modern: Geometric shapes and bold colors can make your bookshelf stand out. I’ve seen some amazing modern designs with asymmetrical shelves that look like pieces of art.
Materials and Tools – DIY Bookshelf
Materials
Choosing the right materials is key to a successful DIY bookshelf. Here’s a rundown of what you’ll need:
- Wood: Options include plywood, MDF, or solid wood. Plywood is cost-effective and sturdy, while solid wood offers a premium finish. For my latest project, I used oak plywood, which gave the bookshelf a beautiful grain and solid feel.
- Hardware: Screws, brackets, and wall anchors are essential. I recommend investing in high-quality screws and brackets to ensure your bookshelf is sturdy and safe.
- Finishes: Paint, stain, or sealant can give your bookshelf a polished look. I’ve tried all three—staining the wood for a rich, natural look or painting it for a splash of color.
Tools
You don’t need a ton of tools, but a few essentials will make the job easier:
- Basic Tools: A saw, drill, and screwdriver are must-haves. I once attempted a bookshelf without a proper saw and ended up with uneven cuts. Trust me, it’s worth having the right tools!
- Optional Tools: Sandpaper for smooth edges, a level to ensure everything is straight, and clamps to hold pieces together while you work. Clamps have saved me from some wobbly shelves more times than I can count.
Step-by-Step Instructions – DIY Bookshelf
Planning and Measuring
Start by sketching your design and determining dimensions. Draw a rough layout of the bookshelf and make sure it fits within the measurements you’ve taken. When I built my first bookshelf, I used graph paper to map out the design. It helped me visualize how the pieces would fit together.
Cutting the Wood
Dimension and cut the wood to match your design. Take your time to get accurate cuts—using a miter saw for precise angles can be a game-changer. I remember my first attempt at cutting wood with a hand saw was a bit rough, but investing in a power saw made the process much smoother.
Assembling the Shelves
Assemble the frame and attach the shelves using brackets or screws. I usually start by assembling the frame and then attach the shelves, ensuring everything is level before securing it. Using a level is crucial; nothing looks worse than a crooked bookshelf!
Finishing Touches
Apply paint or stain to your bookshelf. Don’t rush this step—allow the finish to dry completely before placing items on the shelves. I’ve learned that patience is key here. For my last project, I applied three coats of stain and let it cure for a week before use. The result was well worth the wait.
Tips and Tricks – DIY Bookshelf
- Safety First: Be sure to always use protective equipment such as safety goggles and gloves. It might seem like a hassle, but protecting yourself is crucial. I once had a small piece of wood splinter off and hit my goggles, so I always make sure to wear them now.
- Precision: Double-check your measurements before cutting. This will save you from making mistakes that could be costly and time-consuming. I once cut a piece of wood too short, which delayed my project by a few days.
- Customization: Feel free to add personal touches like adjustable shelves or built-in lighting. I added LED lights to my bookshelf for a dramatic effect, and it turned out beautifully.
Troubleshooting Common Issues
- Uneven Shelves: If your shelves are uneven, check the leveling before securing them. Adjust as needed to make sure everything is straight. I had a shelf that was slightly tilted because I didn’t level it properly, so now I make it a point to double-check.
- Wobbly Bookshelf: If your bookshelf is wobbly, it’s usually due to loose screws or uneven flooring. Tighten all screws and ensure the bookshelf is anchored securely. If it’s still wobbly, check the floor for levelness.
Conclusion
Building your own bookshelf is a rewarding project that adds a unique touch to your home. It’s a chance to showcase your style and creativity while creating something functional. Plus, there’s nothing like the feeling of accomplishment when you see your finished bookshelf filled with your favorite books and treasures.
So, grab your tools, gather your materials, and start crafting your own custom bookshelf today! With a little time and effort, you’ll have a beautiful piece of furniture that’s uniquely yours.
Feel free to share your DIY bookshelf stories or ask questions—I’d love to hear about your projects and help with any challenges you might face. Happy building!
Check more of our Home Decor DIY ideas !
Join our Facebook Community for more informations!
