
Share
Introduction
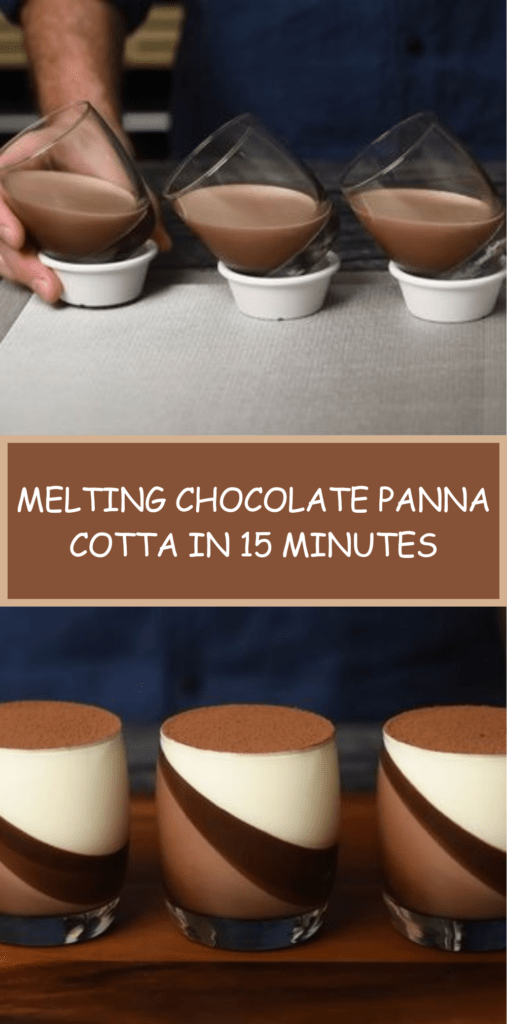
If you want a dessert that feels restaurant-worthy yet stays genuinely simple, melting chocolate panna cotta is the perfect choice. It delivers a luxurious, spoonable texture with a deep cocoa flavor, while requiring very little active time. In fact, once you heat the dairy, melt the chocolate, and dissolve the gelatin, the refrigerator does most of the work. As a result, it is ideal for dinner parties, date nights, holiday menus, or those moments when you want something elegant without spending hours in the kitchen.
Moreover, this recipe is wonderfully reliable. Because the ingredients are straightforward and the method is gentle, you can focus on details that make it special, such as serving it in slanted glasses for a modern presentation or dusting it with cocoa powder for a clean, sophisticated finish. Even better, the flavor improves as it chills, so you can confidently prepare it ahead of time and serve it when you are ready.
History and Recipe Information
Panna cotta, which translates to “cooked cream” in Italian, is traditionally associated with Northern Italy, especially the Piedmont region. While the classic version is often delicately flavored with vanilla, the method has evolved across home kitchens and professional pastry stations alike. Over time, chocolate panna cotta became a popular variation because it keeps the dessert’s signature silkiness while adding bold, comforting depth.
Unlike baked custards, panna cotta sets thanks to gelatin rather than eggs. Therefore, it offers a smooth texture without the risk of curdling or overbaking. At the same time, it holds its shape beautifully when chilled properly, which is why it works so well in glasses, ramekins, or even unmolded onto plates. Additionally, chocolate pairs naturally with the creamy base, creating a dessert that tastes rich but still feels light on the palate.
This melting chocolate panna cotta highlights dark chocolate for an intense flavor. However, it remains balanced because milk and cream soften bitterness, while vanilla rounds out the aroma. Consequently, each bite feels both indulgent and refined.
Ingredients
- 400 ml whole cream
- 200 ml milk
- 100 g dark chocolate, chopped
- 60 g sugar
- 2 gelatin sheets
- 1 teaspoon vanilla extract
- Cocoa powder, for finishing
Preparation Step by Step
Step 1: Soften the gelatin
First, place the gelatin sheets in a bowl of cold water. Then let them soak for 5 to 10 minutes until fully softened. Meanwhile, you can prepare the chocolate by chopping it into small pieces, because smaller pieces melt more quickly and evenly.
Step 2: Heat the cream mixture gently
Next, pour the whole cream and milk into a saucepan. Add the sugar and vanilla extract, and then warm the mixture over medium heat. Stir occasionally so the sugar dissolves smoothly. Importantly, heat it until it is steaming but not boiling, because boiling can affect the final texture and, in some cases, reduce the effectiveness of gelatin.
Step 3: Melt the chocolate off the heat
Once the dairy mixture is hot, remove the saucepan from the heat. Immediately add the chopped dark chocolate. After that, whisk or stir steadily until the chocolate melts completely and the mixture looks glossy and uniform. At this stage, take an extra moment to ensure there are no unmelted pieces, since they can create grainy pockets later.
Step 4: Dissolve the gelatin thoroughly
Now, lift the gelatin sheets from the water and gently squeeze out excess liquid. Then add the softened gelatin to the warm chocolate mixture. Whisk well until it fully dissolves. To avoid any setting issues, keep stirring until you are certain the gelatin is completely integrated, because even small undissolved bits can affect the final set.
Step 5: Pour and chill for the perfect set
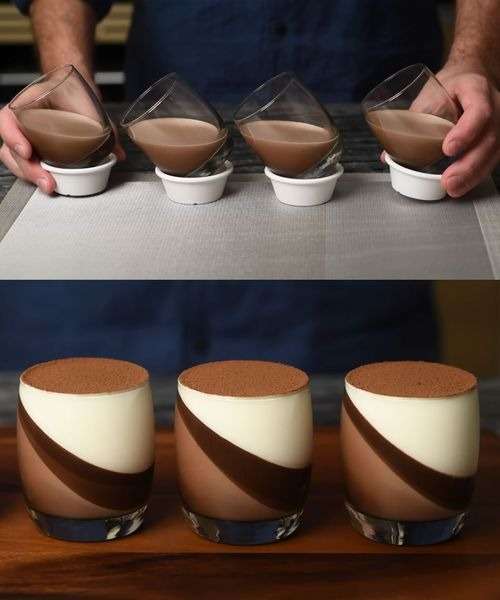
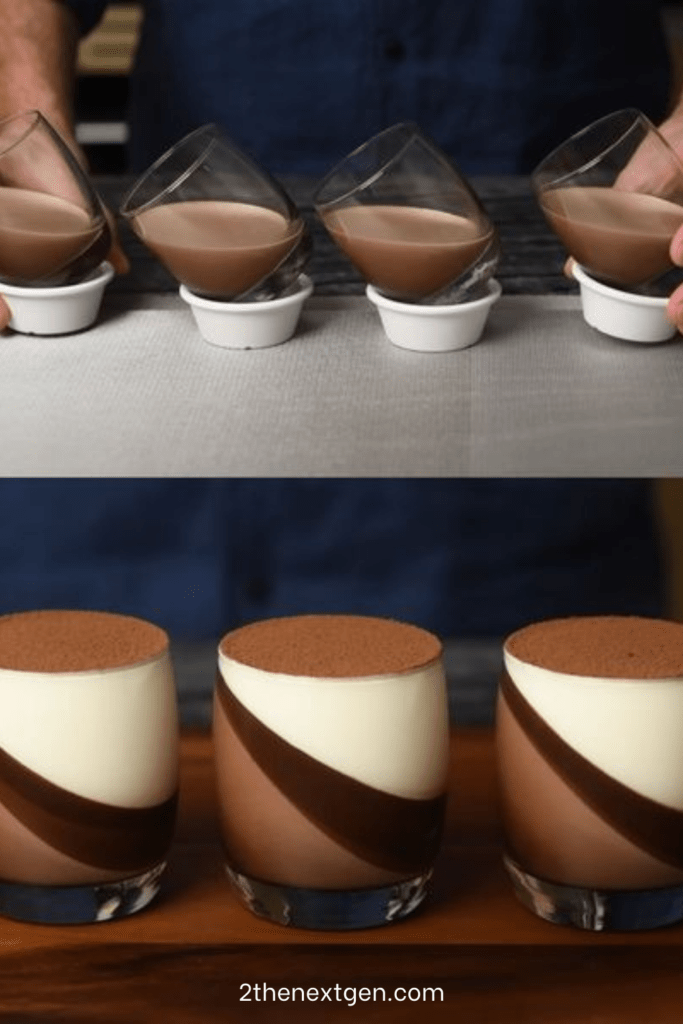
After the mixture is smooth, pour it into serving glasses. For an elegant visual effect, you can tilt the glasses slightly by resting them in a muffin tin or propping them at an angle. Then refrigerate for at least 4 hours, or until fully set. Although it may look set sooner, waiting the full chilling time ensures the panna cotta becomes properly creamy and stable.
Step 6: Finish with cocoa just before serving
Finally, right before serving, dust the tops with cocoa powder. This simple step adds a refined look and a pleasant bittersweet note. If you want a cleaner finish, use a small sieve to sprinkle the cocoa evenly, since that creates a delicate, professional-looking layer.
Nutritional Information
Nutritional values will vary depending on the exact chocolate used and the fat percentage of the dairy. However, as a general guide for one serving (when the recipe serves 4), this dessert is typically moderate to high in calories due to cream and chocolate, with the majority of energy coming from fats and sugars.
Because it includes dairy, it provides small amounts of calcium and protein. Additionally, dark chocolate can contribute minerals such as magnesium and iron, depending on cocoa content. Nevertheless, this remains a treat-style dessert, so it fits best as an occasional indulgence rather than an everyday snack. If you would like a lighter version, you can reduce sugar slightly or use a dark chocolate with a higher cocoa percentage to boost intensity without increasing sweetness.
FAQ
Can I use powdered gelatin instead of gelatin sheets?
Yes, you can. However, you will need to bloom powdered gelatin in cold water first, just as you would soften sheets. As a general equivalent, one sheet is often close to about 2 g, but sheet strengths can vary by brand. Therefore, check the packaging for gram weight, then bloom the correct amount in a few tablespoons of cold water and add it as you would the softened sheets.
Why did my panna cotta not set properly?
This usually happens for a few reasons. Most commonly, the gelatin amount was too low, the gelatin did not fully dissolve, or the mixture was too hot for too long after adding gelatin. Additionally, chilling time matters: even if it looks set, it may still need the full 4 hours to firm up completely. For the best results, dissolve gelatin thoroughly and chill undisturbed.
Can I make this dessert ahead of time?
Absolutely, and it is often better that way. Since panna cotta needs time to set, making it the day before is convenient. Furthermore, chilling overnight improves the texture and makes serving effortless. Just wait to dust with cocoa until right before serving so the top stays neat.
How do I get a two-tone layered effect?
To create a two-tone look, pour the first chocolate layer and chill it until it is partially set, usually around 45 to 60 minutes. Then carefully add a second layer, such as vanilla panna cotta, by pouring slowly over the back of a spoon. After that, refrigerate again until fully set. This method works well because the first layer becomes stable enough to hold the second without mixing.
Can I unmold chocolate panna cotta onto a plate?
Yes, although serving in glasses is easier and more reliable. If you want to unmold, pour the mixture into lightly oiled ramekins. Then chill until fully set. When ready, dip the ramekin briefly in warm water for a few seconds, run a thin knife around the edge, and invert onto a plate. Because chocolate panna cotta is soft and “melting,” handle it gently.
What chocolate works best for this recipe?
A good-quality dark chocolate in the 60–70% cocoa range usually gives the best balance. If you use very high cocoa chocolate, the flavor becomes more intense and slightly less sweet, which many people enjoy. On the other hand, if you use a sweeter dark chocolate, consider reducing sugar slightly so the dessert stays balanced.
Conclusion
Melting chocolate panna cotta is the kind of dessert that looks impressive while staying refreshingly simple. Because it relies on gentle heating and chilling rather than baking, it is both beginner-friendly and consistently elegant. Moreover, the flavor is deeply chocolatey, the texture is silky and spoon-soft, and the presentation can be as minimalist or as creative as you like.
Whether you serve it with a classic cocoa dusting, style it in slanted glasses for a modern finish, or build a two-tone version for extra visual impact, this recipe fits almost any occasion. Most importantly, it allows you to prepare ahead and serve with confidence, which makes it a dependable favorite you will return to again and again.

Check also:
Lemon Chicken Ricotta Meatballs
Chicken and meat easy Recipes
Suggestions:
- Roasted Tomato Caprese Salad with Balsamic and Basil
- Sheet Pan Zucchini Chickpeas with Feta and Lemon
- Burrata Bruschetta with Marinated Cherry Tomatoes
- Easy Garlic Butter Cauliflower and Mushroom Skillet
- Easy Mint and Feta Stuffed Flatbreads in a Skillet