


Share
Introduction
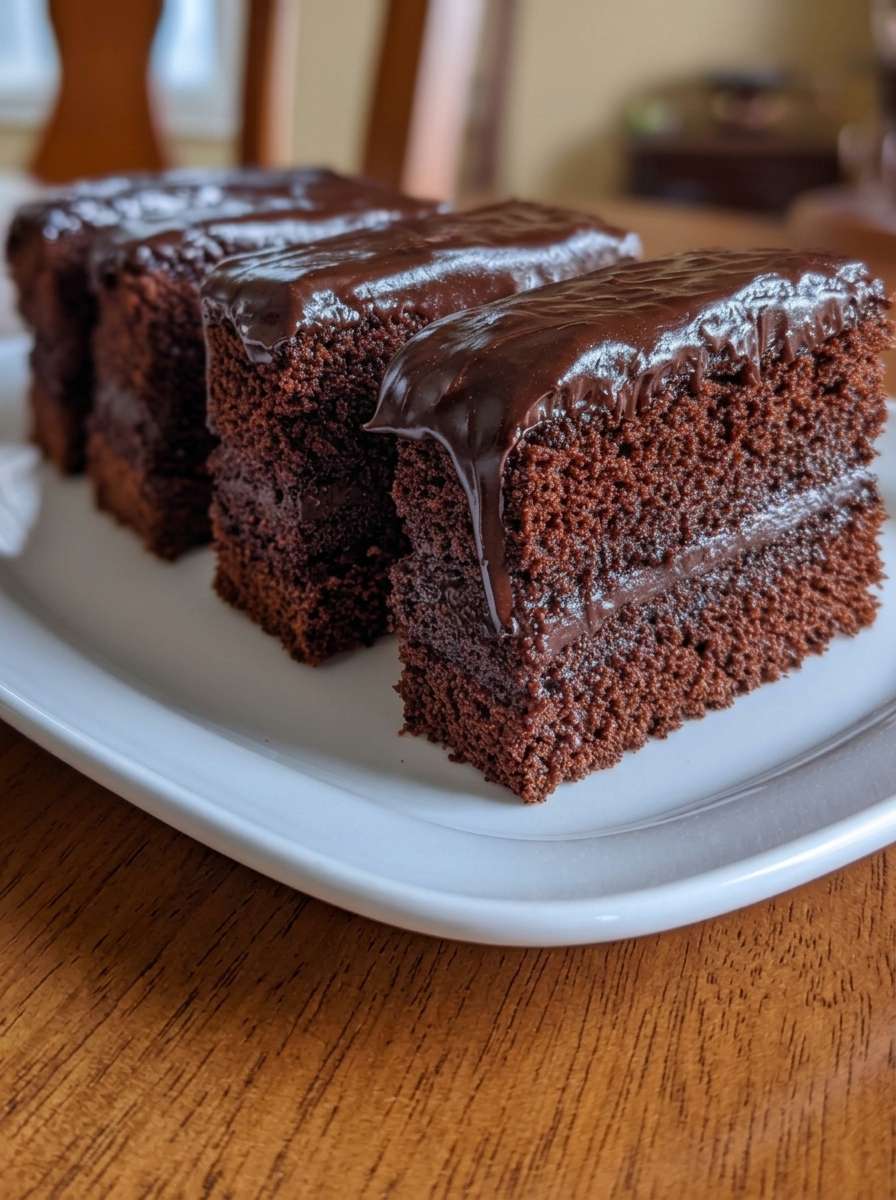
Sugar-free frosted fudge cakes are soft, chocolatey snack cakes made with a tender low-carb sponge, a creamy cocoa filling, and a glossy fudge-style topping. They taste rich and satisfying, yet they are made without regular sugar and use smart low-carb ingredients like almond flour, oat fiber, allulose, Greek yogurt, and sugar-free chocolate chips.
These cakes are perfect when you want a homemade chocolate dessert that feels like a nostalgic snack cake but fits a sugar-free lifestyle. The sponge is light and soft, the filling is smooth and lightly tangy, and the fudge topping adds the perfect chocolate finish. As a result, each rectangle has the satisfying texture of a layered treat without being overly heavy.
Moreover, this recipe is ideal for meal prep because the cakes are baked, filled, chilled, and sliced into individual portions. You can keep them in the refrigerator and enjoy one when you want a chilled chocolate dessert, an afternoon snack, or a small sweet bite after dinner.
Another great advantage is that the recipe uses a thin sheet cake method. Instead of baking two separate layers, the chocolate sponge is baked in one pan, cooled, cut in half, filled, stacked, frosted, and sliced. Therefore, the process stays simple while still creating a beautiful layered result.
If you love chocolate cake, fudge frosting, and creamy snack-style desserts, these sugar-free frosted fudge cakes are a recipe worth saving. They are soft, rich, low in net carbs, and deliciously chocolatey.
History and Information About Frosted Fudge Cakes
Frosted fudge cakes are inspired by classic chocolate snack cakes that became popular because they are easy to serve, portion, and enjoy. Traditionally, these little cakes are made with soft chocolate sponge, sweet cream filling, and a chocolate glaze or frosting on top. They are usually cut into neat rectangles, which makes them practical for lunchboxes, dessert trays, and quick snacks.
However, many traditional snack cakes contain refined flour, sugar, and sweet frosting. This sugar-free version keeps the same comforting idea but uses lower-carb ingredients to create a lighter, more balanced treat. Almond flour replaces most of the traditional flour, oat fiber improves the structure, and allulose provides sweetness without regular sugar.
The chocolate sponge is designed to be thin and flexible enough to layer. Eggs whipped with allulose create volume, while Greek yogurt and almond milk help keep the cake moist. Cocoa powder gives the sponge its deep chocolate flavor, and whey protein isolate helps support the structure without making the cake too heavy.
The filling is similar to a light chocolate cream. It combines softened light cream cheese, strained Greek yogurt, powdered allulose, cocoa powder, and vanilla. This creates a smooth and tangy filling that balances the richness of the sponge and fudge topping. Because the yogurt is strained before measuring, the filling stays thick and creamy instead of watery.
Overall, this recipe is a modern sugar-free twist on a classic chocolate treat. It delivers the familiar pleasure of frosted fudge cakes while keeping the ingredients lower in carbs and suitable for a more mindful dessert routine.
Ingredients
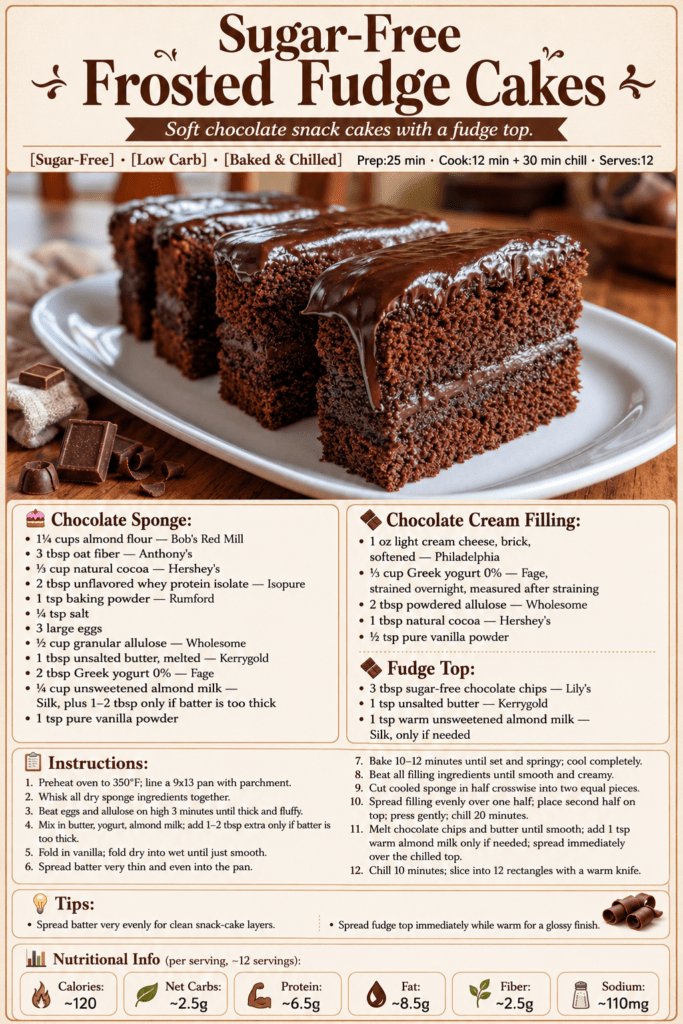
- 1 1/4 cups almond flour
- 3 tablespoons oat fiber
- 1/3 cup natural cocoa powder
- 2 tablespoons unflavored whey protein isolate
- 1 teaspoon baking powder
- 1/4 teaspoon salt
- 3 large eggs
- 1/2 cup granular allulose
- 1 tablespoon unsalted butter, melted
- 2 tablespoons Greek yogurt 0%
- 1/4 cup unsweetened almond milk, plus 1 to 2 tablespoons only if needed
- 1 teaspoon pure vanilla powder
- 1 oz light cream cheese, brick style, softened
- 1/3 cup Greek yogurt 0%, strained overnight and measured after straining
- 2 tablespoons powdered allulose
- 1 tablespoon natural cocoa powder
- 1/2 teaspoon pure vanilla powder
- 3 tablespoons sugar-free chocolate chips
- 1 teaspoon unsalted butter
- 1 teaspoon warm unsweetened almond milk, only if needed
Preparation Step by Step
Step 1: Prepare the Pan and Preheat the Oven
First, preheat the oven to 350°F. Line a 9×13-inch baking pan with parchment paper, making sure the paper covers the bottom and sides well enough to lift the sponge out after baking.
This step is important because the chocolate sponge will be thin and delicate. Parchment paper makes it easier to remove from the pan without breaking. It also helps create a smooth bottom surface, which is useful when stacking the cake layers.
Before starting the batter, gather all ingredients and measure them carefully. Since low-carb baking depends on balance, accurate measurements help the sponge bake evenly and keep the right texture.
Step 2: Mix the Dry Sponge Ingredients
In a medium bowl, whisk together the almond flour, oat fiber, cocoa powder, whey protein isolate, baking powder, and salt. Mix until the dry ingredients are evenly combined and no large cocoa lumps remain.
Whisking the dry ingredients separately helps distribute the baking powder and cocoa evenly through the batter. As a result, the sponge rises more consistently and has a smooth chocolate flavor throughout.
Almond flour gives the cake tenderness, oat fiber helps structure the sponge, cocoa powder adds rich chocolate taste, and whey protein isolate supports the texture. Together, they create a low-carb sponge that stays soft after chilling.
Step 3: Beat the Eggs and Allulose
In a large mixing bowl, beat the eggs and granular allulose on high speed for about 3 minutes. The mixture should become thick, pale, and fluffy.
This step is one of the most important parts of the recipe. Beating the eggs well adds air to the batter, which helps create a lighter sponge. Since low-carb cakes do not behave exactly like traditional wheat flour cakes, this extra volume makes a noticeable difference.
The mixture should look slightly increased in volume before you move to the next step. Therefore, do not rush this part.
Step 4: Add the Moist Ingredients
Add the melted butter, Greek yogurt, and unsweetened almond milk to the egg mixture. Mix gently until combined.
The melted butter adds richness, while the Greek yogurt helps keep the sponge moist. Almond milk loosens the batter just enough to spread it thinly in the pan.
If the batter later seems too thick, you can add 1 to 2 extra tablespoons of almond milk. However, add extra liquid only if necessary, because too much can make the sponge fragile.
Step 5: Fold in the Vanilla and Dry Ingredients
Add the vanilla powder, then gently fold the dry ingredients into the wet mixture. Mix only until the batter becomes smooth and evenly combined.
Avoid overmixing. Once the almond flour and cocoa mixture are incorporated, stop folding. Overmixing can deflate some of the air from the eggs and make the sponge denser.
The finished batter should be chocolatey, smooth, and spreadable. It should not be runny, but it should be soft enough to spread into a thin, even layer.
Step 6: Spread the Batter Evenly
Transfer the batter into the prepared 9×13-inch pan. Spread it very thin and even with a spatula, reaching all corners of the pan.
This step affects the final appearance of the snack cakes. If one area is thicker than another, the layers may look uneven after stacking. Therefore, take your time and smooth the surface as evenly as possible.
A thin, even sponge will bake quickly and create clean layers once filled and sliced.
Step 7: Bake and Cool the Chocolate Sponge
Bake the sponge for 10 to 12 minutes, or until it is set and springy to the touch. The cake should not look wet in the center, but it should still feel soft.
Do not overbake it. Since the sponge is thin, it can dry out quickly if left in the oven too long. A soft and springy texture is best because the cake will be chilled later.
Once baked, remove the pan from the oven and let the sponge cool completely. Do not assemble the cakes while the sponge is warm, because the filling may soften and become messy.
Step 8: Prepare the Chocolate Cream Filling
While the sponge cools, prepare the filling. In a bowl, beat the softened light cream cheese with the strained Greek yogurt, powdered allulose, cocoa powder, and vanilla powder until smooth and creamy.
The cream cheese should be softened so it blends easily. The strained yogurt should be thick, because excess liquid can make the filling loose. Together, they create a light chocolate cream with a balanced flavor.
Taste the filling and adjust sweetness if needed. The cocoa adds depth, while the powdered allulose keeps the texture smooth.
Step 9: Cut and Fill the Sponge
Once the sponge is completely cool, lift it gently from the pan using the parchment paper. Cut it in half crosswise to create two equal pieces.
Place one half on a flat surface or tray. Spread the chocolate cream filling evenly over it, reaching the edges without making the layer too thick in the center.
Then, place the second half of the sponge on top and press gently. Do not press too hard, because the filling should stay in an even layer rather than squeeze out.
Step 10: Chill the Filled Cake
Place the filled cake in the refrigerator and chill for about 20 minutes. This helps the filling firm up slightly and makes the cake easier to frost.
Chilling before adding the fudge topping is important because a cold surface helps the melted chocolate set more neatly. It also keeps the layers stable while you spread the topping.
If the cake feels very soft, you can chill it a little longer before frosting.
Step 11: Make the Fudge Topping
Melt the sugar-free chocolate chips with the butter until smooth. You can do this gently in the microwave in short intervals or over a double boiler.
Stir until the chocolate becomes glossy. If it seems too thick to spread, add 1 teaspoon of warm unsweetened almond milk and mix well. Add almond milk only if needed, because too much liquid can change the texture.
The fudge topping should be smooth enough to spread but thick enough to set into a soft chocolate layer.
Step 12: Frost, Chill, and Slice
Spread the warm fudge topping immediately over the chilled cake. Work quickly because the chocolate will begin to set as it touches the cold surface.
Once the top is coated, refrigerate the cake for about 10 minutes, or until the fudge layer firms slightly. Then, slice into 12 rectangles using a warm knife.
For clean slices, wipe the knife between cuts. Serve the cakes chilled for the best texture and flavor.
Nutritional Information
The following nutritional values are approximate and may vary depending on the exact brands and ingredients used. This estimate is based on 12 servings.
Each sugar-free frosted fudge cake contains approximately 120 calories, 2.5 g net carbs, 6.5 g protein, 8.5 g fat, 2.5 g fiber, and 110 mg sodium.
These snack cakes are lower in net carbs because they use almond flour, oat fiber, allulose, and sugar-free chocolate chips instead of regular flour and sugar. The whey protein isolate and Greek yogurt add protein, while the almond flour and butter provide richness.
Because the cakes are portioned into rectangles, they are easy to enjoy in moderation. They are also satisfying thanks to the combination of protein, fiber, and fat. For a slightly lighter version, you can use a thinner layer of fudge topping. For a richer version, you can increase the filling slightly or use full-fat cream cheese.
Overall, these cakes are a smart sugar-free dessert option for chocolate lovers who want a chilled, portion-controlled treat.
FAQ
Can I Make These Sugar-Free Fudge Cakes Ahead of Time?
Yes, these cakes are excellent for making ahead. In fact, they taste best after chilling because the filling firms up and the fudge topping sets properly. You can prepare them a day in advance and store them in the refrigerator.
Can I Use a Different Sweetener Instead of Allulose?
Yes, you can use another sugar-free sweetener, but the texture and sweetness may change. Allulose works well because it blends smoothly and keeps baked goods softer. If using a sweeter substitute, adjust the quantity to taste.
Why Is the Sponge Baked So Thin?
The sponge is baked thin because it will be cut in half and stacked with filling. This creates snack-cake layers without needing two separate pans. A thin sponge also bakes quickly and gives the cakes a soft, even texture.
Can I Skip the Whey Protein Isolate?
You can omit it, but the texture may be slightly softer and less structured. Whey protein isolate helps support the low-carb sponge and adds protein. If skipping it, be careful not to add too much extra liquid to the batter.
How Do I Keep the Cake Layers Even?
Spread the batter very evenly in the pan before baking. Use a spatula to push the batter into the corners and smooth the top. After baking, cool the sponge completely before cutting and stacking.
Can I Use Regular Cocoa Powder?
Yes, natural unsweetened cocoa powder is ideal for this recipe. It gives a classic chocolate flavor without added sugar. Avoid sweetened cocoa mixes, because they usually contain sugar and other ingredients.
Why Should the Cake Be Chilled Before Adding the Fudge Top?
Chilling the filled cake helps stabilize the layers and makes the fudge topping set more neatly. If the cake is too warm or soft, the topping may mix with the filling or become difficult to spread evenly.
How Should I Store Sugar-Free Frosted Fudge Cakes?
Store the cakes in an airtight container in the refrigerator for up to 4 days. They are best served chilled. If stacking them, place parchment paper between layers to protect the fudge topping.
Can I Freeze These Cakes?
Yes, you can freeze them, although the filling may soften slightly after thawing. Freeze the sliced cakes in a single layer first, then transfer them to a freezer-safe container. Thaw in the refrigerator before serving.
Conclusion
Sugar-free frosted fudge cakes are a delicious low-carb chocolate dessert with soft sponge layers, creamy cocoa filling, and a glossy fudge topping. They deliver the nostalgic feel of classic snack cakes while using sugar-free and lower-carb ingredients.
Furthermore, the recipe is practical and easy to portion. The sponge bakes quickly in one pan, the filling comes together in minutes, and the fudge topping sets after a short chill. With a warm knife, the cake slices neatly into 12 satisfying rectangles.
Whether you enjoy them as a chilled dessert, a snack cake, or a make-ahead chocolate treat, these sugar-free frosted fudge cakes are rich, soft, and full of chocolate flavor. They are simple enough for everyday baking and special enough to share.
Check also:
Lemon Chicken Ricotta Meatballs
Chicken and meat easy Recipes
Suggestions:
- Crispy Garlic Parmesan Fries Baked to Golden Perfection
- Creamy Tomato and Roasted Red Pepper Fusilli Recipe
- Juicy Grilled Beef Kofta Recipe with Creamy Yogurt Sauce
- Easy Ground Beef Fried Rice with Mixed Vegetables Recipe
- Moist Date and Walnut Loaf with Honey Glaze Recipe