


Share
Introduction
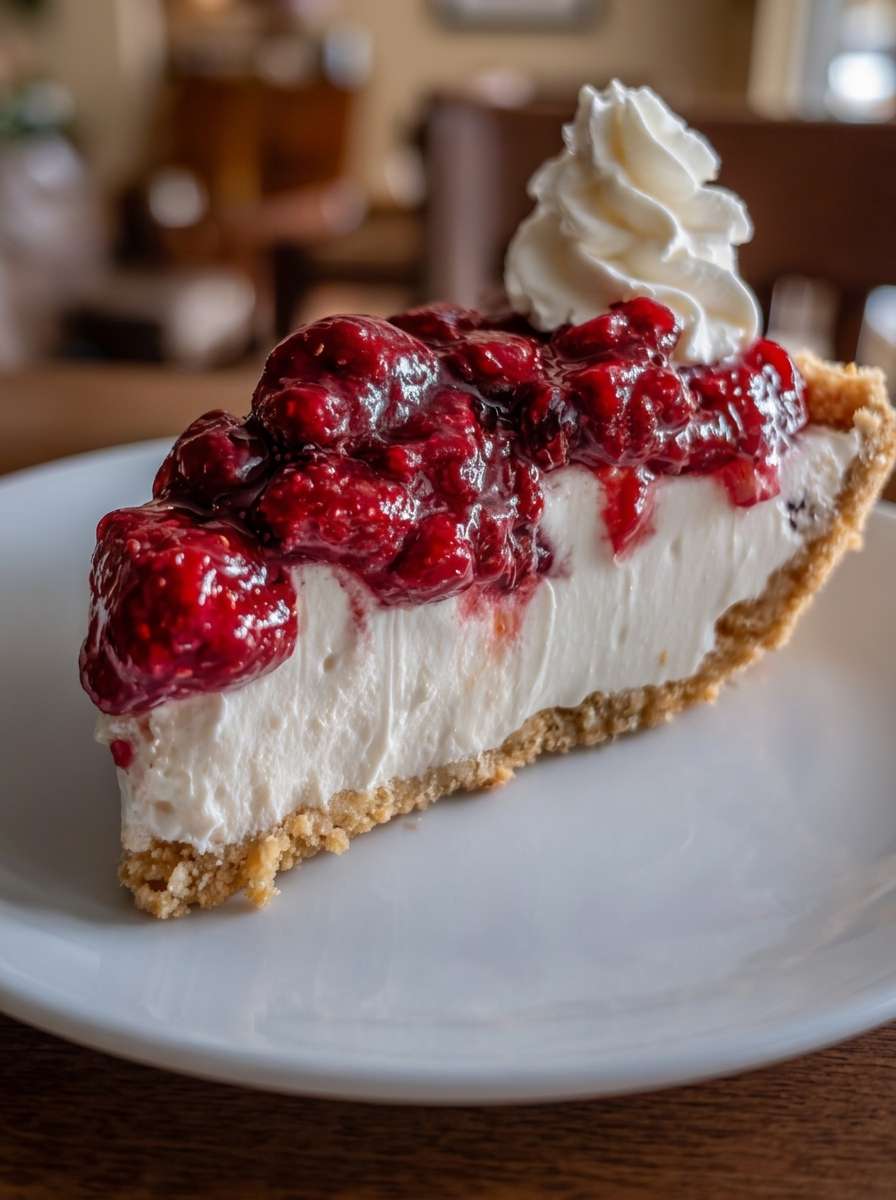
This sugar-free raspberry cream pie is a light, creamy, and refreshing no-bake dessert that feels elegant without being complicated. It combines a tender almond flour crust, an airy vanilla cream filling, and a glossy raspberry topping made with real fruit. As a result, every slice is smooth, fruity, lightly tangy, and beautifully satisfying.
Moreover, this recipe is designed for anyone who wants a dessert with no added sugar while still enjoying a creamy pie texture. Instead of regular sugar, it uses allulose, which gives sweetness without making the dessert heavy. In addition, the filling combines light cream cheese, strained Greek yogurt, whipped cream, whey protein isolate, and gelatin for a smooth yet stable texture.
The raspberry topping is one of the best parts of this pie. It is bright, fresh, slightly tart, and naturally colorful. Since the topping is cooked gently with lemon juice and thickened with a little arrowroot, it becomes glossy and spoonable without feeling too dense.
This pie is also perfect for warm days because it is served cold and requires no oven. Therefore, it is a wonderful choice for summer gatherings, family desserts, low-carb meal plans, or anyone who loves fruit-based creamy desserts.
If you enjoy no-bake pies, raspberry desserts, and lighter sugar-free treats, this sugar-free raspberry cream pie is a recipe worth saving. It is simple, beautiful, and full of fresh berry flavor.
History and Information About Raspberry Cream Pie
Cream pies have been a beloved part of home baking for generations. Traditionally, they are made with a crisp or crumbly crust, a soft cream filling, and a fruit, chocolate, or custard topping. They became popular because they are easy to prepare ahead of time and can be served chilled, making them practical for family meals and celebrations.
Raspberry cream pie is especially popular because raspberries bring a natural balance of sweetness and acidity. Their tart flavor cuts through the richness of cream and cheese, making the dessert taste fresh rather than heavy. This is one reason raspberries are often used in cheesecakes, mousse cakes, parfaits, and chilled pies.
This version takes the classic idea of raspberry cream pie and makes it sugar-free and lower in carbs. Instead of a traditional cookie or pastry crust, it uses almond flour and oat fiber. Almond flour gives the crust a rich, nutty flavor, while oat fiber helps improve the texture without adding many net carbs. Melted butter brings everything together, and a small amount of bloomed gelatin helps the crust hold its shape once chilled.
The filling is inspired by a lighter cheesecake-style cream. Light cream cheese gives structure and flavor, strained Greek yogurt adds tang and smoothness, and whipped cream makes the texture airy. Whey protein isolate adds protein and helps support the creamy body of the filling. Gelatin is used carefully to help the pie set without becoming rubbery.
Although this dessert looks like a special-occasion pie, it is very practical. Most of the time is chilling time, not active work. Therefore, it is a great make-ahead recipe when you want a beautiful chilled dessert that fits a sugar-free or low-carb lifestyle.
Ingredients
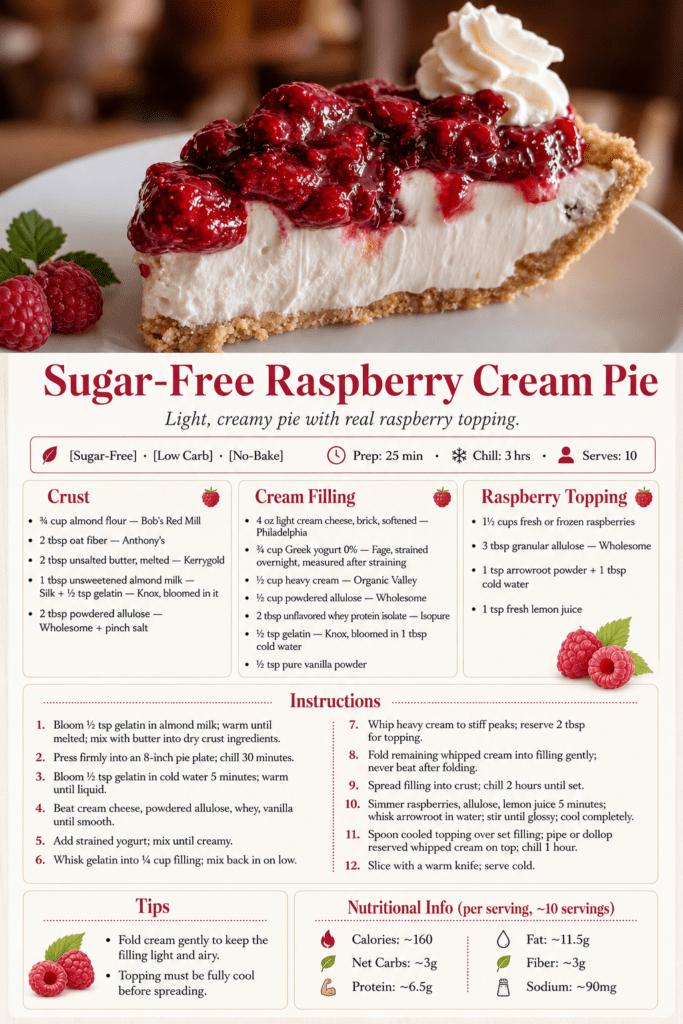
- 3/4 cup almond flour
- 2 tablespoons oat fiber
- 2 tablespoons unsalted butter, melted
- 1 tablespoon unsweetened almond milk
- 1/2 teaspoon gelatin, bloomed in the almond milk
- 2 tablespoons powdered allulose
- 1 pinch salt
- 4 oz light cream cheese, brick style, softened
- 3/4 cup Greek yogurt 0%, strained overnight and measured after straining
- 1/2 cup heavy cream
- 1/2 cup powdered allulose
- 2 tablespoons unflavored whey protein isolate
- 1/2 teaspoon gelatin, bloomed in 1 tablespoon cold water
- 1/2 teaspoon pure vanilla powder
- 1 1/2 cups fresh or frozen raspberries
- 3 tablespoons granular allulose
- 1 teaspoon arrowroot powder
- 1 tablespoon cold water
- & 1 teaspoon fresh lemon juice
Preparation Step by Step
Step 1: Bloom the Gelatin for the Crust
First, place the unsweetened almond milk in a small bowl and sprinkle the gelatin over the top. Let it sit for a few minutes so the gelatin can bloom.
Blooming gelatin is important because it allows the granules to absorb liquid before they are warmed. As a result, the gelatin melts more evenly and blends smoothly into the crust mixture.
Once bloomed, warm the mixture gently until the gelatin is fully melted. Do not boil it. It only needs enough heat to become liquid.
Step 2: Make the Almond Crust Mixture
In a mixing bowl, combine the almond flour, oat fiber, powdered allulose, and a pinch of salt. Stir well so the dry ingredients are evenly distributed.
Next, add the melted butter and the warm gelatin mixture. Mix until the texture becomes slightly sandy but holds together when pressed.
The almond flour gives the crust flavor and richness, while the oat fiber helps create a more structured texture. The butter adds moisture, and the gelatin helps the crust firm up in the refrigerator.
Step 3: Press the Crust into the Pie Plate
Transfer the crust mixture into an 8-inch pie plate. Press it firmly into the bottom and slightly up the sides.
Use the back of a spoon, the bottom of a measuring cup, or clean fingers to compact the crust evenly. This step is essential because the pie is no-bake. A firmly pressed crust will slice more cleanly and hold the creamy filling better.
Once pressed, place the crust in the refrigerator and chill it for 30 minutes.
Step 4: Bloom the Gelatin for the Filling
While the crust chills, bloom the second portion of gelatin in 1 tablespoon of cold water. Let it sit for about 5 minutes until it thickens.
After blooming, warm it gently until it becomes liquid. Again, avoid boiling. The goal is to melt the gelatin so it can blend into the cream filling smoothly.
This small amount of gelatin helps the filling set while still keeping it soft and creamy.
Step 5: Beat the Cream Cheese Mixture
In a large bowl, beat the softened light cream cheese with powdered allulose, whey protein isolate, and vanilla powder. Mix until smooth and creamy.
Make sure the cream cheese is softened before mixing. If it is too cold, the filling may become lumpy. A smooth base is important because it creates a silky final texture.
The whey protein isolate helps add structure and protein, while the vanilla gives the filling a soft dessert flavor.
Step 6: Add the Strained Greek Yogurt
Add the strained Greek yogurt to the cream cheese mixture and mix until creamy.
Straining the yogurt overnight is helpful because it removes extra moisture. This makes the filling thicker, smoother, and less likely to become watery after chilling.
The yogurt also adds a pleasant tang that balances the sweetness of the allulose and the richness of the cream cheese.
Step 7: Incorporate the Gelatin
Take about 1/4 cup of the cream filling and whisk it into the melted gelatin. Then, add this mixture back into the main bowl and mix on low speed.
This method helps distribute the gelatin evenly. If you pour warm gelatin directly into the full filling, it may create small lumps. By mixing it first with a small amount of filling, the texture stays smoother.
Mix gently and only until combined.
Step 8: Whip the Heavy Cream
In a separate bowl, whip the heavy cream until stiff peaks form. Then, reserve 2 tablespoons of whipped cream for topping the pie later.
The whipped cream gives the filling its light and airy texture. Since this pie is meant to feel creamy but not too dense, this step is very important.
Make sure not to overwhip the cream. It should be firm enough to hold its shape but still smooth.
Step 9: Fold the Whipped Cream into the Filling
Gently fold the remaining whipped cream into the cream cheese and yogurt mixture. Use a spatula and slow movements so the filling stays airy.
Do not beat the mixture after adding the whipped cream. Beating can deflate the air and make the filling heavier. Instead, fold until the texture is even and fluffy.
Once ready, spread the filling into the chilled crust and smooth the top.
Step 10: Chill the Cream Pie
Place the pie in the refrigerator and chill for about 2 hours, or until the filling is set.
This chilling time allows the gelatin to work and helps the filling become sliceable. The crust also becomes firmer, making the pie easier to serve.
Do not add the raspberry topping until the filling is properly set.
Step 11: Make the Raspberry Topping
Place the raspberries, granular allulose, and lemon juice in a small saucepan. Simmer for about 5 minutes, stirring gently, until the raspberries soften and release their juices.
In a small bowl, mix the arrowroot powder with cold water to make a slurry. Stir this slurry into the raspberry mixture and cook briefly until glossy and slightly thickened.
The topping should be spoonable, bright, and shiny. Remove it from the heat and let it cool completely.
Step 12: Add the Topping and Final Chill
Once the raspberry topping is fully cool, spoon it over the set cream filling. Spread it gently without pressing too hard.
Then, pipe or dollop the reserved whipped cream on top. Place the pie back in the refrigerator and chill for 1 more hour.
When ready to serve, slice the pie with a warm knife for cleaner pieces. Serve cold for the best texture and flavor.
Nutritional Information
The following nutritional values are approximate and may vary depending on the exact brands and ingredients used. This estimate is based on 10 servings.
Each serving contains approximately 160 calories, 3 g net carbs, 6.5 g protein, 11.5 g fat, 3 g fiber, and 90 mg sodium.
This sugar-free raspberry cream pie is lower in net carbs because it uses almond flour, oat fiber, allulose, and a yogurt-based filling instead of a traditional sugar-heavy crust and filling. The cream cheese, heavy cream, and almond flour provide richness, while the strained Greek yogurt and whey protein isolate add protein and help make the pie more satisfying.
Raspberries also bring fiber, natural color, and a bright fruit flavor. Because they are naturally tart, they work very well in sugar-free desserts. The lemon juice enhances their flavor, while the allulose softens the acidity without adding regular sugar.
To make the pie slightly lighter, you can use less whipped cream or cut smaller slices. To make it richer, you can use full-fat cream cheese instead of light cream cheese. However, the original version gives a good balance between creamy texture, fresh flavor, and lower-carb ingredients.
FAQ
Can I Make This Sugar-Free Raspberry Cream Pie Ahead of Time?
Yes, this pie is excellent for making ahead. In fact, it needs several hours to chill and set properly. You can prepare it the day before serving and keep it covered in the refrigerator until ready to slice.
Can I Use Frozen Raspberries?
Yes, frozen raspberries work very well in the topping. You do not need to thaw them first, although the cooking time may be slightly longer. Simmer until the berries soften and release their juices, then thicken with the arrowroot slurry.
Can I Replace Allulose with Another Sweetener?
Yes, you can use another powdered or granular sugar-free sweetener, but the taste and texture may vary. Allulose works well because it dissolves smoothly and has a mild flavor. Some sweeteners may be sweeter than allulose, so adjust the amount as needed.
Why Do I Need to Strain the Greek Yogurt?
Straining the Greek yogurt removes extra liquid and makes the filling thicker. This helps prevent the pie from becoming watery after chilling. For the best texture, strain the yogurt overnight and measure it after straining.
Can I Make This Pie Without Whey Protein Isolate?
Yes, you can omit the whey protein isolate, but the filling may be slightly softer and lower in protein. If leaving it out, make sure the yogurt is well strained and the pie is chilled long enough to set properly.
How Do I Keep the Filling Light and Airy?
Whip the heavy cream to stiff peaks, then fold it gently into the filling. Do not beat the mixture after folding in the whipped cream. Gentle folding keeps air in the filling and creates a lighter texture.
Why Must the Raspberry Topping Be Cool Before Spreading?
The topping must be completely cool before it is added to the cream filling. If it is warm, it can soften or melt the filling and create a messy top. Cooling also helps the topping thicken and become glossy.
Can I Use Another Fruit Topping?
Yes, you can use strawberries, blueberries, blackberries, or mixed berries. However, raspberries work especially well because their tart flavor balances the creamy filling. If using sweeter fruit, you may need less allulose.
How Should I Store This Pie?
Store the pie covered in the refrigerator for up to 3 days. Because it contains cream cheese, yogurt, whipped cream, and fruit topping, it should be kept cold. For the cleanest slices, cut it straight from the refrigerator.
Conclusion
This sugar-free raspberry cream pie is a fresh, creamy, and beautiful no-bake dessert that is perfect for anyone who wants a lighter low-carb treat. With its almond flour crust, airy vanilla cream filling, and glossy raspberry topping, it delivers a satisfying balance of richness and bright berry flavor.
Furthermore, the recipe is practical because it can be prepared ahead of time. The crust chills quickly, the filling sets beautifully, and the raspberry topping adds a vibrant finish. Since it is served cold, it is especially enjoyable during warm weather or after a rich meal.
Whether you are making it for a family gathering, a weekend dessert, or a sugar-free treat to keep in the refrigerator, this raspberry cream pie is simple, elegant, and delicious. Serve it cold, slice it with a warm knife, and enjoy a creamy fruit dessert that feels indulgent while staying low in net carbs.
Check also:
Lemon Chicken Ricotta Meatballs
Chicken and meat easy Recipes
Suggestions:
- Baked Eggs with Mushrooms and Comté Cheese
- Warm Chicken Sweet Potato and Feta Bowl
- Pesto Mozzarella Sun Tart: Easy Puff Pastry Appetizer
- Roasted Pears with Honey and Blue Cheese Appetizer
- Savory Corn and Cheddar Pancakes: Easy Brunch Recipe