


Share
Introduction
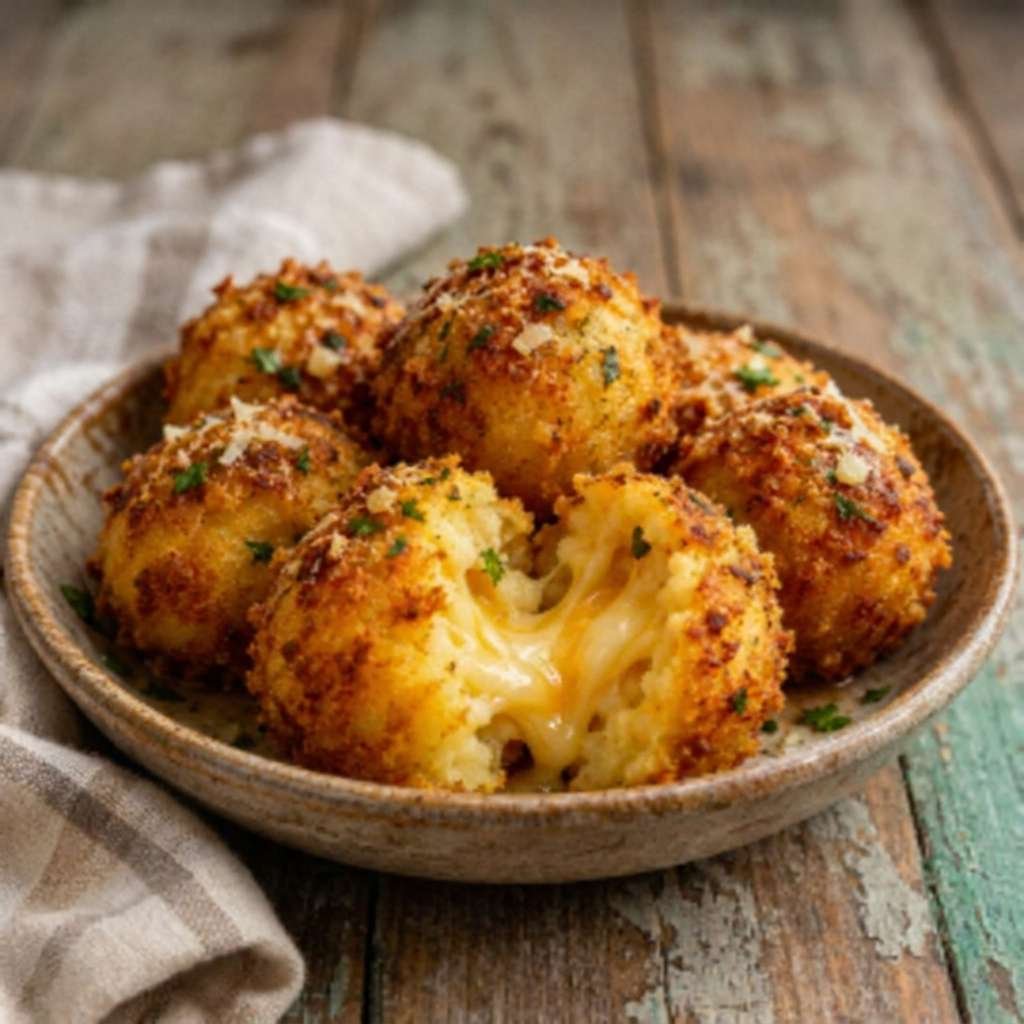
Imagine biting into a perfectly golden, crispy potato ball and discovering a soft, fluffy center filled with rich, melted cheese and fragrant garlic butter. That irresistible combination is exactly what makes these Crispy Potato and Cheese Bombs with Garlic Butter such a delicious homemade treat.
Whether you need an easy appetizer for a family gathering, a comforting afternoon snack, or a crowd-pleasing addition to your dinner table, these cheesy potato bombs are an excellent choice. They combine simple ingredients, including potatoes, cheddar cheese, Parmesan, fresh parsley, and garlic butter, to create something wonderfully satisfying.
Furthermore, this recipe requires no complicated techniques or expensive ingredients. With a little preparation and a few helpful tips, you can create crispy potato bites that rival your favorite restaurant appetizers.
The best part? Every bite delivers a beautiful contrast between the crunchy exterior and creamy, cheesy interior. Served with garlic aioli, ranch dressing, or spicy mayonnaise, these homemade potato cheese bombs are almost impossible to resist.
What Are Crispy Potato and Cheese Bombs?
Crispy potato and cheese bombs are small, round appetizers made from seasoned mashed potatoes mixed with cheese and flavorful ingredients. The mixture is shaped into balls, chilled until firm, and then fried until the outside becomes golden and crispy.
Inside, however, the potatoes remain wonderfully soft while the cheese melts into a rich, savory filling.
These delicious bites share similarities with traditional potato croquettes, which have long been popular in European cooking. Croquettes are generally made from mashed potatoes, vegetables, meat, or other fillings, shaped into small portions, and fried until golden.
Over time, numerous versions of potato croquettes have appeared around the world. Some contain mozzarella, others include herbs or spices, and many feature breadcrumbs for an extra-crunchy coating.
Unlike traditional breaded croquettes, this particular recipe relies on a well-chilled potato and cheese mixture to develop its golden exterior during frying.
Additionally, the combination of cheddar and Parmesan creates a particularly flavorful filling. Cheddar contributes a creamy, slightly sharp taste, while Parmesan adds a deeper savory note.
Meanwhile, garlic butter enhances the overall richness, and fresh parsley brings a subtle freshness that balances the cheese.
Why You’ll Love This Garlic Butter Potato Bombs Recipe
There are several reasons why these crispy cheesy potato balls deserve a place in your recipe collection.
First, they use everyday ingredients that are easy to find in most supermarkets. Consequently, you can prepare an impressive appetizer without a complicated shopping list.
Second, their bite-sized shape makes them ideal for sharing. They are perfect for parties, movie nights, family dinners, or weekend gatherings.
Moreover, the recipe is versatile. Although cheddar and Parmesan provide the classic flavor combination, you can experiment with different cheeses, seasonings, and dipping sauces.
Finally, these potato bombs offer an enjoyable contrast of textures. Their crispy outside and creamy center make them especially comforting when served fresh and warm.
Recipe Information
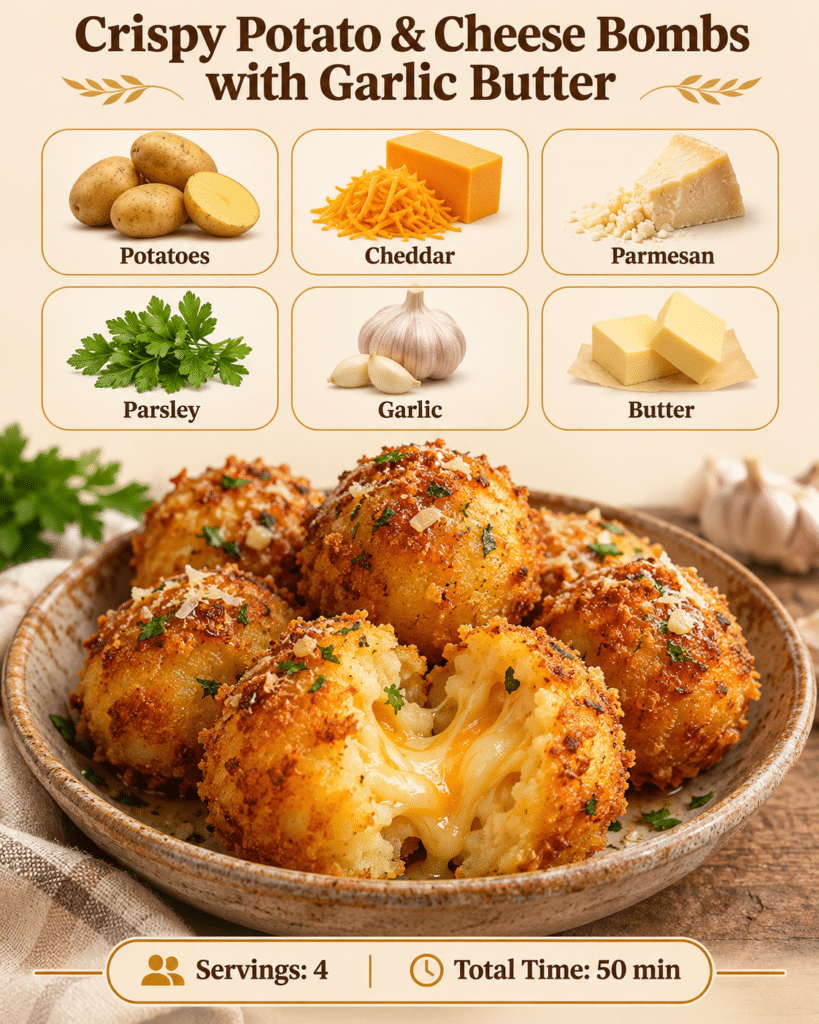
- Servings: 4
- Original estimated total time: 50 minutes
- Preparation method: Boiling, chilling, and frying
- Difficulty: Easy to moderate
- Course: Appetizer, snack, or side dish
- Best served: Hot and freshly fried
Note: Because the recipe includes 30 minutes of refrigeration, 15–20 minutes of boiling, and frying in batches, the actual elapsed time may exceed 50 minutes.
Ingredients for Crispy Potato and Cheese Bombs
To prepare these delicious homemade cheesy potato bites, you will need the following ingredients:
- 2 large potatoes, peeled and diced
- 1 cup shredded cheddar cheese
- ¼ cup grated Parmesan cheese
- ¼ cup fresh parsley, chopped
- ¼ cup garlic butter
- Salt and black pepper, to taste
- Oil for frying
For serving, you can also offer garlic aioli, ranch dressing, or spicy mayonnaise as optional dipping sauces.
Choosing the Best Ingredients
For the best results, choose starchy potatoes such as Russet potatoes, which produce a light, fluffy mash. Alternatively, Yukon Gold potatoes offer a naturally creamy texture.
Freshly shredded cheddar is particularly useful because it generally melts smoothly. Parmesan, meanwhile, contributes a slightly salty, nutty flavor.
Additionally, fresh parsley provides a pleasant herbal aroma, while garlic butter gives the potato mixture its distinctive savory richness.
Most importantly, avoid adding unnecessary liquid to the potatoes. Excess moisture can make the mixture difficult to shape and less stable during frying.
How to Make Crispy Potato and Cheese Bombs Step by Step
Follow these detailed instructions to prepare delicious potato cheese bombs with a beautifully golden exterior and soft, flavorful center.
Step 1: Boil the Potatoes Until Tender
Begin by peeling the potatoes and cutting them into evenly sized cubes. This ensures that they cook at approximately the same rate.
Next, place the diced potatoes in a large saucepan and cover them with cold water. Add a generous pinch of salt to season them during cooking.
Bring the water to a boil, then cook the potatoes for approximately 15–20 minutes.
To check whether they are ready, insert a fork into one of the larger pieces. If it slides through easily, the potatoes are fully cooked.
Step 2: Drain and Mash the Potatoes
Once the potatoes are tender, drain them thoroughly using a colander.
Allow them to sit briefly so that excess steam and moisture can escape. This step is especially important because overly wet mashed potatoes can produce a loose mixture.
Afterward, transfer the potatoes to a large mixing bowl and mash them until smooth.
For the best texture, use a potato masher rather than a blender or food processor, which can make potatoes gluey.
The finished mash should be smooth, fluffy, and thick enough to hold its shape.
Step 3: Add the Cheese, Garlic Butter, and Seasonings
While the mashed potatoes are still warm, add the shredded cheddar cheese and grated Parmesan.
Next, incorporate the chopped fresh parsley and garlic butter.
Season with salt and freshly ground black pepper according to your preference.
Using a wooden spoon or spatula, gently mix everything until the ingredients are evenly distributed.
The warmth of the potatoes will help soften the cheese and butter, creating a rich and creamy mixture.
However, avoid excessive mixing, as this can negatively affect the texture of the potatoes.
Step 4: Shape the Potato Mixture Into Balls
Allow the potato mixture to cool slightly until it is comfortable to handle.
Then, take a small portion and roll it between your palms to create a ball approximately the size of a golf ball.
Continue shaping the remaining mixture into evenly sized portions.
Try to make each ball compact and smooth, without large cracks on the surface.
If the mixture feels slightly sticky, you can lightly dampen your hands with water.
Uniform sizing is important because it helps all the potato bombs cook evenly.
Step 5: Refrigerate the Potato Balls
Line a baking tray with parchment paper and arrange the shaped potato balls on top.
Make sure they are separated slightly so they do not stick together.
Next, place the tray in the refrigerator for approximately 30 minutes.
This chilling period helps the potato mixture firm up, making the balls easier to handle and less likely to lose their shape during frying.
Therefore, although it may be tempting to skip this stage, refrigeration is strongly recommended for the best results.
Step 6: Heat the Frying Oil
Pour enough frying oil into a deep, heavy-bottomed frying pan to allow the potato balls to cook comfortably.
Heat the oil over medium heat until it reaches approximately 350°F (175°C).
If possible, use a kitchen thermometer to monitor the temperature.
Oil that is too cool can make the potato bombs greasy, while excessively hot oil may brown the outside before the center warms through.
Furthermore, avoid overcrowding the pan, since adding too many potato balls at once can lower the oil temperature.
Step 7: Fry Until Golden Brown and Crispy
Carefully place a few chilled potato balls into the hot oil.
Fry them in small batches for approximately 3–4 minutes per side, turning gently when necessary.
As they cook, the exterior should gradually develop a beautiful golden-brown color.
Meanwhile, the cheese inside will soften and melt, producing the creamy filling that makes these bites so appealing.
Handle the balls carefully because the mixture is delicate and does not contain a breadcrumb coating.
Once the exterior is golden and firm, remove the potato bombs from the oil.
Step 8: Remove Excess Oil
Using a slotted spoon, transfer the fried potato balls to a plate lined with paper towels.
Allow them to rest briefly so that any excess oil can drain away.
Alternatively, placing them on a wire rack can help preserve their crispy texture by allowing air to circulate underneath.
Repeat the frying process with the remaining potato balls, maintaining a consistent oil temperature between batches.
Step 9: Serve Warm With Your Favorite Dip
Finally, arrange the freshly fried potato and cheese bombs on a serving plate.
For the best experience, serve them immediately while the outside remains crispy and the cheese inside is warm and melted.
Pair them with garlic aioli, classic ranch dressing, or spicy mayonnaise for an extra burst of flavor.
A little freshly chopped parsley sprinkled over the top can also add color and freshness.
Expert Tips for Perfectly Crispy Potato Cheese Bombs
Achieving the ideal combination of crispy exterior and creamy interior requires attention to a few important details.
First, always drain the potatoes thoroughly. Moisture is one of the main reasons potato mixtures become too soft to shape properly.
Next, avoid adding milk or cream when mashing. Although these ingredients are excellent for traditional mashed potatoes, they can make potato bombs difficult to fry.
Additionally, do not skip the chilling stage. Refrigerating the shaped balls improves their firmness and helps prevent them from breaking apart.
Another useful tip is to maintain a steady oil temperature. If the oil cools too much, the potato bombs may absorb excess fat instead of developing a crispy surface.
Finally, fry in small batches and serve immediately. Freshly cooked potato bombs deliver the best texture and flavor.
Delicious Variations and Serving Ideas
Although the original garlic butter potato bombs are already delicious, several variations can make them even more interesting.
For example, replace some of the cheddar with mozzarella for a milder flavor and a particularly stretchy cheese filling.
Alternatively, add a small pinch of smoked paprika or chili flakes to introduce warmth and gentle spice.
You can also experiment with different fresh herbs, such as chives or finely chopped green onions.
For serving, arrange the potato bombs alongside a fresh green salad, grilled vegetables, or roasted chicken.
Additionally, they make an excellent addition to an appetizer platter with several dipping sauces.
Whether served as a starter or a casual snack, these cheesy potato bites are wonderfully adaptable.
Nutritional Information
The following values are approximate estimates per serving, assuming the recipe makes four servings. Actual nutritional content varies according to potato size, cheese brands, garlic butter composition, and the amount of frying oil absorbed.
- Calories: Approximately 400–480 kcal
- Protein: Approximately 12–16 g
- Carbohydrates: Approximately 30–40 g
- Total fat: Approximately 25–35 g
- Fiber: Approximately 3–4 g
Potatoes provide carbohydrates, potassium, and some dietary fiber. Meanwhile, cheddar and Parmesan contribute protein and calcium.
However, because the recipe contains butter, cheese, and frying oil, it is also relatively rich in fat and calories.
Consequently, these crispy potato bombs are best enjoyed as part of a balanced meal, alongside vegetables or a fresh salad.
Frequently Asked Questions About Potato and Cheese Bombs
Can I Make Potato and Cheese Bombs Ahead of Time?
Yes. You can prepare and shape the potato balls in advance, then store them in an airtight container in the refrigerator for up to 24 hours before frying.
In fact, preparing them ahead of time can make entertaining much easier.
Keep the balls chilled until you are ready to cook them for the best results.
Why Are My Potato Cheese Bombs Falling Apart?
Potato bombs can fall apart when the mashed potatoes contain too much moisture or when the mixture has not been chilled sufficiently.
Additionally, oil that is not hot enough can cause the exterior to soften before it becomes firm.
To prevent this, drain the potatoes thoroughly, refrigerate the shaped balls, and maintain a consistent frying temperature.
Can I Bake Potato and Cheese Bombs Instead of Frying?
Yes, although the texture will be different.
To try a baked version, arrange the chilled potato balls on a parchment-lined baking tray and lightly brush them with oil.
Bake at 425°F (220°C) for approximately 20–25 minutes, turning gently if they are firm enough to handle.
However, because this mixture contains no additional binder, the balls may spread or lose some of their shape in the oven.
What Is the Best Cheese for Potato Cheese Bombs?
Cheddar and Parmesan work particularly well together because they provide both creamy texture and savory flavor.
Nevertheless, you can experiment with mozzarella, Gouda, or Monterey Jack.
For example, mozzarella is an excellent choice if you prefer a softer, stretchier cheese filling.
How Should I Store and Reheat Leftover Potato Bombs?
Allow the cooked potato bombs to cool, then transfer them to an airtight container and refrigerate promptly.
They can generally be stored in the refrigerator for up to 3–4 days.
For reheating, place them in an oven preheated to 375°F (190°C) for approximately 8–12 minutes, or until thoroughly heated.
An air fryer can also help restore some crispiness.
Avoid relying on the microwave if you want to preserve their crunchy exterior, since it tends to soften fried foods.
What Dipping Sauces Go Best With Crispy Potato Bombs?
Garlic aioli is an excellent choice because it complements the rich garlic butter flavor.
Ranch dressing provides a cool, creamy contrast, while spicy mayonnaise adds a pleasant kick.
Alternatively, a tangy yogurt-based sauce or homemade tomato dip can balance the richness of the cheese.
For gatherings, offering several sauces allows everyone to choose their favorite combination.
Conclusion
Crispy Potato and Cheese Bombs with Garlic Butter are a wonderful example of how simple ingredients can become an incredibly satisfying homemade appetizer.
With their golden exterior, soft mashed potato center, melted cheddar, Parmesan, and aromatic garlic butter, these flavorful bites offer the perfect combination of comfort and indulgence.
Moreover, their versatility makes them suitable for almost any occasion, from relaxed family dinners to festive gatherings.
By following the preparation steps carefully, draining the potatoes thoroughly, chilling the mixture, and maintaining the correct frying temperature, you can create delicious potato bombs with an appealing texture.
Serve them warm with your favorite dipping sauce, and enjoy a comforting homemade snack that brings together crispy potatoes, melted cheese, and irresistible garlic flavor.
Check also:
Lemon Chicken Ricotta Meatballs
Chicken and meat easy Recipes
Suggestions:
- Honey BBQ Popcorn Chicken: Crispy & Easy Recipe
- Easy to Make Philadelphia Cheesesteak Egg Rolls
- Smashburger Grilled Cheese: Crispy 15-Minute Recipe
- Cheesy Garlic Chicken Wraps: Crispy 25-Minute Dinner
- Easy Crispy Potato and Cheese Bombs with Garlic Butter