

Share
Introduction
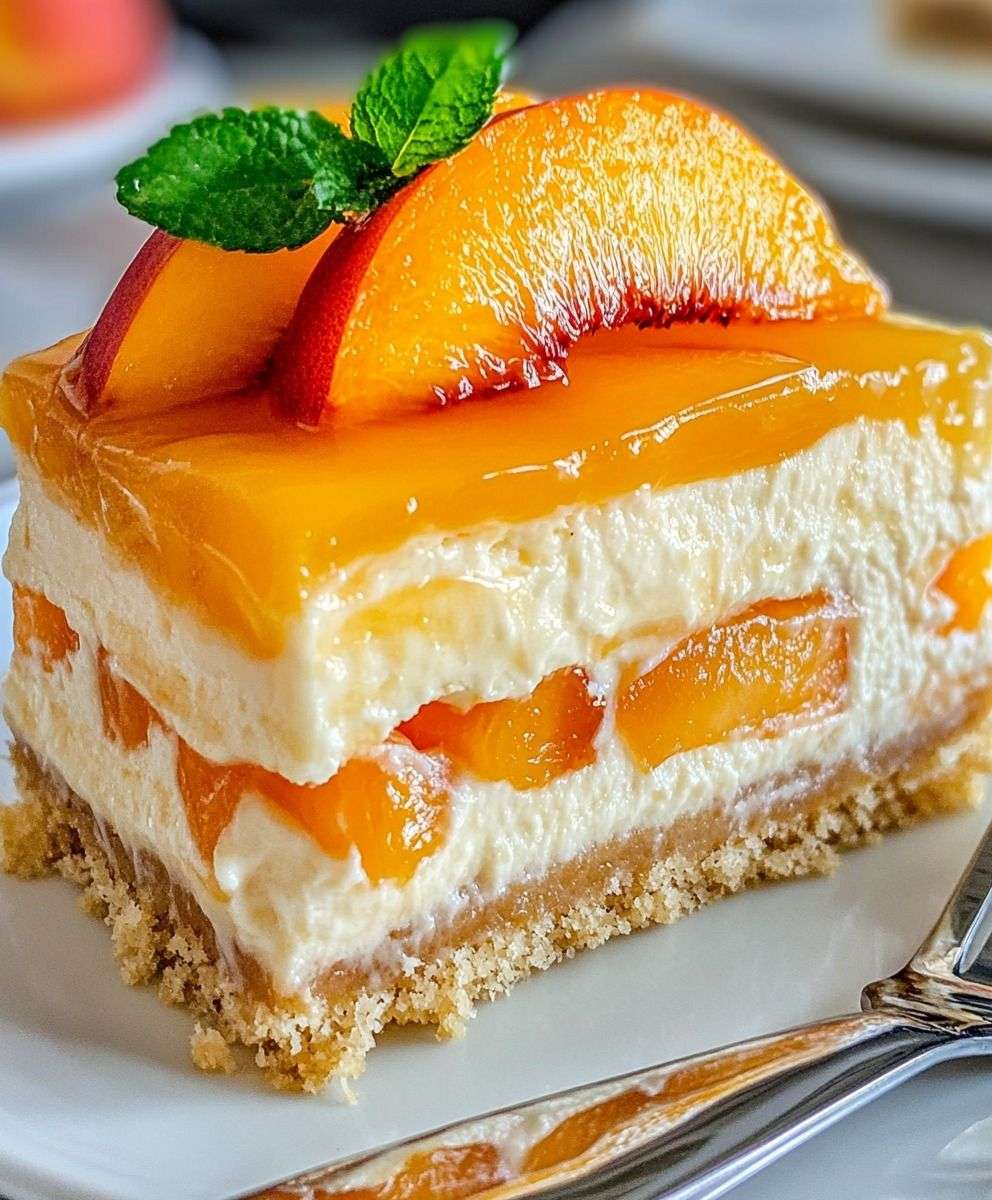
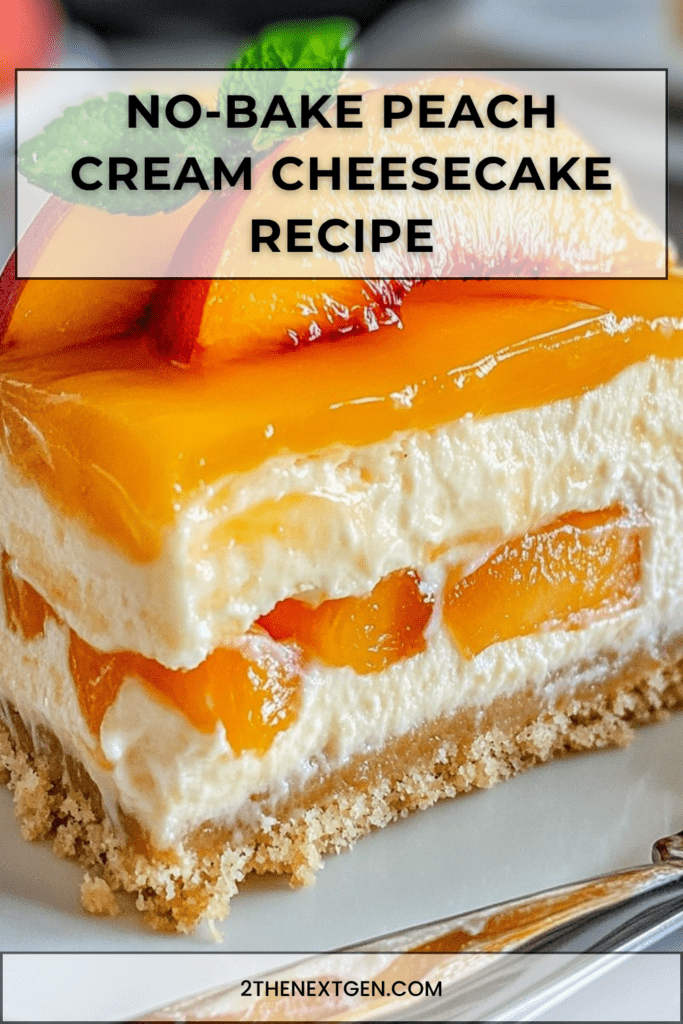
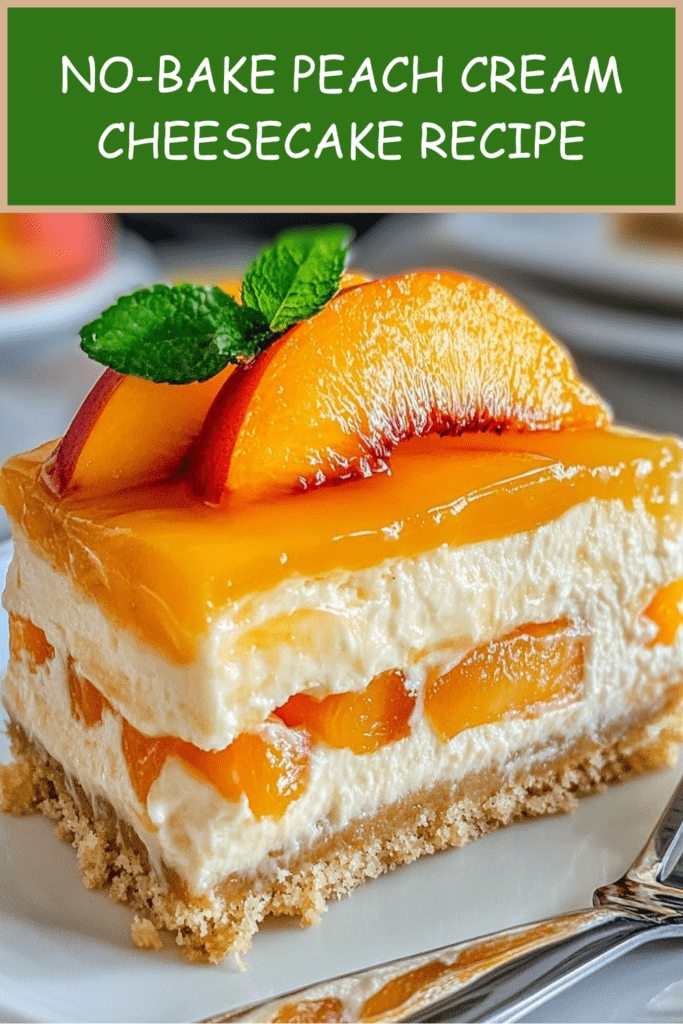
No-Bake Peach Cream Cheesecake is a fresh, creamy, and fruity dessert made with a buttery biscuit crust, smooth cream cheese filling, sweet peach pieces, and a glossy peach topping. It is light, elegant, and perfect for warm days, family gatherings, birthdays, holidays, or any occasion when you want a beautiful dessert without turning on the oven.
This cheesecake is especially delicious because it combines a rich creamy filling with the bright sweetness of peaches. The biscuit crust gives the dessert a buttery crunch, while the peach cream layer stays fluffy, smooth, and refreshing. Then, the peach topping adds color, shine, and extra fruit flavor.
Moreover, this recipe is easy to prepare ahead of time. Since it needs at least 6 hours to chill, it is ideal for making the night before serving. As a result, the texture becomes firmer, the flavors blend beautifully, and the cheesecake slices more cleanly.
In addition, this no-bake peach cheesecake is easy to customize. You can use canned peaches or fresh peaches, add gelatin for a firmer texture, or replace peaches with mangoes, apricots, or pineapple for a different fruity version. Therefore, if you enjoy creamy no-bake desserts, fruit cheesecakes, and easy make-ahead recipes, this peach cream cheesecake is a perfect choice.
History and Information About Peach Cheesecake
Cheesecake has been enjoyed in many forms for generations. While traditional baked cheesecake is rich, dense, and made with eggs, no-bake cheesecake is softer, lighter, and easier to prepare. Instead of baking, the filling firms up in the refrigerator, which creates a creamy and mousse-like texture.
No-bake cheesecakes became popular because they are practical and reliable. They usually combine cream cheese, whipped cream, sugar, vanilla, and a biscuit crust. Since there is no oven involved, they are especially appreciated during summer or when a quick chilled dessert is needed.
Peaches are a classic fruit for desserts because they are sweet, juicy, fragrant, and naturally colorful. Their soft texture pairs beautifully with cream cheese, vanilla, lemon juice, and whipped cream. Whether fresh or canned, peaches bring a sunny flavor that makes cheesecake taste lighter and more refreshing.
The biscuit crust in this recipe is inspired by classic cheesecake bases. Digestive biscuits or graham crackers are crushed and mixed with melted butter to form a firm, buttery layer. This crust gives structure to the cheesecake and balances the softness of the filling.
The peach topping adds another layer of flavor and presentation. By gently thickening peach puree or nectar with cornstarch, you create a glossy fruit topping that spreads smoothly over the cheesecake. Once chilled, it gives the dessert a beautiful finish and a fresh peach taste in every slice.
Ingredients
For the Biscuit Crust
- 250 g digestive biscuits or graham crackers
- 100 g melted butter
- 1 tablespoon sugar, optional
For the Peach Cream Filling
- 500 g cream cheese, softened
- 250 ml heavy cream, very cold
- 100 g powdered sugar
- 1 teaspoon vanilla extract
- 1 tablespoon lemon juice
- 250 g canned or fresh peaches, diced and well drained
For the Peach Topping
- 250 g peach puree or peach nectar
- 2 tablespoons sugar
- 1 tablespoon lemon juice
- 1 teaspoon cornstarch mixed with 2 tablespoons water
- Peach slices, for decoration
- Fresh mint leaves, optional
Preparation Step by Step
Step 1: Prepare the Biscuit Crumbs
First, crush the digestive biscuits or graham crackers into fine crumbs. You can use a food processor for a very even texture. However, if you do not have one, place the biscuits in a sealed bag and crush them with a rolling pin.
The crumbs should be fine enough to press firmly into the pan. Large pieces can make the crust crumbly and harder to slice. Therefore, take a moment to make sure the texture is even.
Transfer the crumbs to a mixing bowl before adding the butter.
Step 2: Make the Biscuit Crust
Add the melted butter and sugar if using to the biscuit crumbs. Mix until the texture looks like wet sand.
The butter helps bind the crumbs together, while the optional sugar adds a little sweetness. Since the filling and topping are already sweet, the sugar can be skipped if you prefer a more balanced dessert.
Press the mixture firmly into the bottom of a square dish or springform pan. Use the back of a spoon or the bottom of a glass to create an even, compact layer.
Place the crust in the refrigerator while preparing the filling. This helps it firm up and hold its shape.
Step 3: Beat the Cream Cheese
In a large bowl, beat the softened cream cheese with powdered sugar, vanilla extract, and lemon juice until smooth.
The cream cheese should be at room temperature before mixing. If it is too cold, the filling may become lumpy. Softened cream cheese blends more easily and creates a silky texture.
Powdered sugar is ideal because it dissolves quickly and keeps the filling smooth. Vanilla adds warmth, while lemon juice balances the sweetness and gives the cheesecake a fresher taste.
Step 4: Whip the Heavy Cream
In another bowl, whip the very cold heavy cream until firm peaks form.
Cold cream is important because it whips better and holds its shape. For best results, you can also chill the bowl and whisk before whipping.
Firm peaks mean the cream holds its shape when lifted. However, do not overwhip, because the cream can become grainy. The goal is a smooth, thick, and fluffy texture.
Step 5: Fold the Cream into the Cheese Mixture
Gently fold the whipped cream into the cream cheese mixture using a spatula.
Fold slowly from the bottom of the bowl upward. This keeps the filling light and airy. If you stir too strongly, the whipped cream may lose volume and the cheesecake can become dense.
Continue folding until the filling is smooth, creamy, and evenly combined.
Step 6: Add the Diced Peaches
Add the diced peaches to the cream filling and fold gently.
The peaches must be well drained before adding them. This is very important because excess juice can make the filling watery and prevent the cheesecake from setting properly.
If you are using canned peaches, drain them in a sieve and pat them lightly with paper towels. If using fresh peaches, choose ripe but firm fruit so the pieces stay visible in the cream.
Step 7: Assemble the First Cream Layer
Remove the chilled biscuit crust from the refrigerator. Spread half of the peach cream filling over the crust.
Use a spatula to smooth the layer evenly. Make sure the filling reaches the edges of the pan so the cheesecake sets neatly.
If desired, add a few extra peach pieces over this first cream layer for more fruit flavor and texture.
Step 8: Add the Remaining Filling
Spread the remaining peach cream filling over the first layer and smooth the surface with a spatula.
Try to create an even top because the peach topping will be poured over it later. A smooth surface makes the final cheesecake look more elegant.
Place the cheesecake in the refrigerator while preparing the peach topping. This helps the filling begin to firm up slightly before the topping is added.
Step 9: Prepare the Peach Topping
In a small saucepan, add the peach puree or peach nectar, sugar, and lemon juice.
Heat the mixture over medium heat, stirring gently. The sugar will dissolve, and the peach mixture will become warm and smooth.
The lemon juice adds brightness and prevents the topping from tasting too sweet. It also helps enhance the natural peach flavor.
Step 10: Thicken the Topping
Add the cornstarch mixture to the warm peach puree or nectar. Stir constantly until the topping thickens slightly.
This should take about 1 minute after adding the cornstarch. The texture should be glossy and pourable, not too thick or jelly-like.
Once thickened, remove the topping from the heat and let it cool completely. This step is essential because warm topping can melt the cheesecake filling.
Step 11: Add the Peach Topping
When the peach topping is completely cool, pour it over the cheesecake.
Spread it evenly over the surface with a spoon or spatula. Work gently so you do not disturb the cream layer underneath.
The topping should create a smooth, glossy layer that adds color and fruit flavor. If it has thickened too much while cooling, stir it gently before spreading.
Step 12: Decorate the Cheesecake
Decorate the top with peach slices and fresh mint leaves if desired.
Arrange the peach slices neatly for a beautiful presentation. Mint leaves add a fresh green contrast and make the cheesecake look more elegant.
You can keep the decoration simple or add more fruit depending on the occasion. Fresh berries also pair nicely with peaches if you want extra color.
Step 13: Chill Until Firm
Cover the cheesecake and refrigerate for at least 6 hours. For the best texture, chill it overnight.
This chilling time allows the filling to firm up, the crust to set, and the topping to become stable. Do not rush this step, because no-bake cheesecakes need enough time to hold their shape.
For a firmer cheesecake, add 1 teaspoon of dissolved gelatin to the cream filling before chilling. This is especially useful if you want very clean slices.
Step 14: Slice and Serve
When the cheesecake is fully chilled, slice it with a clean sharp knife.
For neater slices, wipe the knife between each cut. You can also dip the knife in warm water, dry it, and then slice.
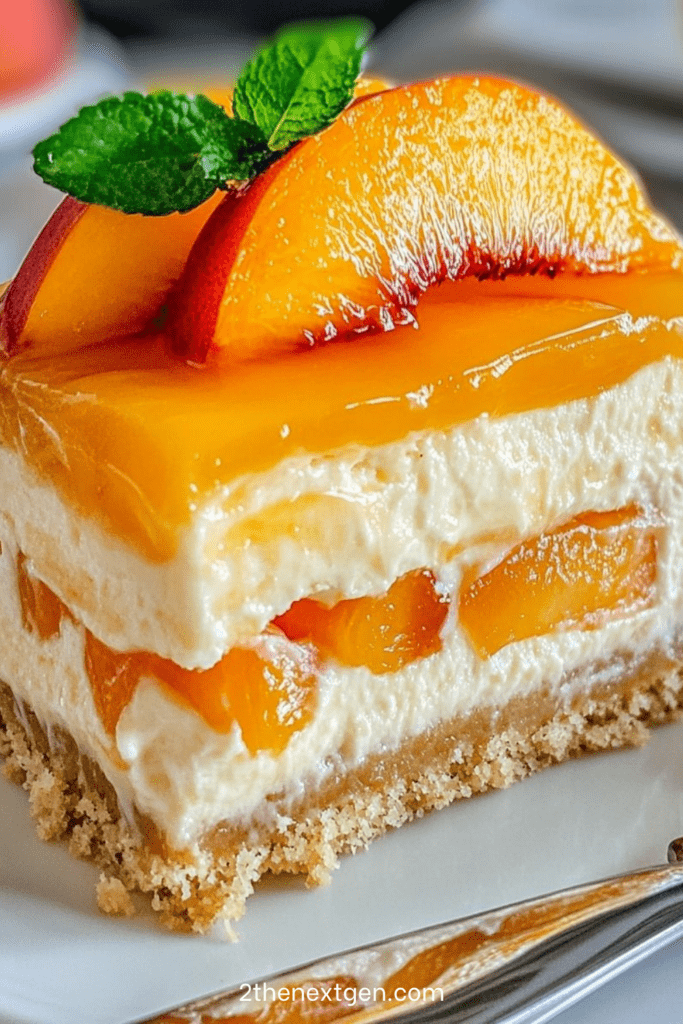
Serve the cheesecake cold. Each slice should show the biscuit crust, creamy peach filling, and glossy peach topping.
Step 15: Enjoy as a Make-Ahead Dessert
This no-bake peach cream cheesecake is perfect for preparing ahead. It can be made the night before and kept refrigerated until serving.
Serve it after a family meal, at a summer gathering, or as a refreshing weekend dessert. It pairs beautifully with coffee, tea, iced drinks, or fresh fruit on the side.
Nutritional Information
The following nutritional values are approximate and may vary depending on the type of biscuits, cream cheese, cream, peaches, and portion size used.
For one slice, based on 10 slices:
Calories: approximately 360 to 480 kcal
Protein: approximately 6 g
Carbohydrates: approximately 38 g
Fat: approximately 22 to 34 g
Sugar: approximately 25 g
Fiber: approximately 2 g
Sodium: varies depending on biscuits and cream cheese used
No-bake peach cream cheesecake is a rich chilled dessert because it contains cream cheese, heavy cream, butter, biscuits, and sugar. However, the peaches add fruit flavor, freshness, and natural sweetness, which makes the dessert feel lighter and more refreshing.
To make the recipe slightly lighter, use reduced-fat cream cheese, reduce the powdered sugar slightly, or replace part of the cream cheese with Greek yogurt. For a richer version, add more cream, extra peach pieces, or a caramel drizzle before serving.
FAQ
Can I Use Canned Peaches?
Yes, canned peaches work very well in this recipe. However, they must be drained very well before adding them to the filling. Too much syrup or juice can make the cheesecake watery.
Can I Use Fresh Peaches?
Yes, fresh peaches are delicious in this cheesecake. Choose ripe but firm peaches so they hold their shape. Peel them if desired, then dice them into small pieces.
Why Is My No-Bake Cheesecake Too Soft?
The cheesecake may be too soft if the cream was not whipped enough, the peaches were too wet, or the dessert did not chill long enough. For a firmer texture, chill overnight or add dissolved gelatin to the filling.
Do I Need Gelatin for This Recipe?
Gelatin is optional. The cheesecake can set without it if the cream is whipped properly and the dessert chills long enough. However, gelatin helps create cleaner slices and a firmer texture.
Can I Make This Cheesecake Ahead of Time?
Yes, this cheesecake is perfect for making ahead. Prepare it the day before, chill overnight, and decorate before serving if needed.
Can I Use Peach Nectar Instead of Peach Puree?
Yes, peach nectar works well for the topping. If using nectar, the cornstarch helps thicken it into a glossy layer. Peach puree gives a slightly thicker and more natural fruit texture.
Can I Replace Peaches with Another Fruit?
Yes, you can replace peaches with mangoes, apricots, pineapple, strawberries, or mixed berries. Adjust the topping flavor to match the fruit you choose.
How Long Can I Store This Cheesecake?
Store the cheesecake covered in the refrigerator for up to 3 days. Keep it chilled until serving so the filling stays firm and fresh.
Can I Freeze No-Bake Peach Cheesecake?
Freezing is possible, but the texture may change slightly after thawing, especially because of the fruit. For best results, serve it fresh from the refrigerator.
What Can I Serve with Peach Cheesecake?
This cheesecake is delicious on its own, but you can serve it with whipped cream, extra peach slices, berry sauce, vanilla ice cream, or a drizzle of caramel sauce.
Conclusion
No-Bake Peach Cream Cheesecake is a creamy, fruity, and refreshing dessert that is easy to prepare and beautiful to serve. With a buttery biscuit crust, fluffy cream cheese filling, diced peaches, and a glossy peach topping, every slice is smooth, sweet, and full of fresh flavor.
The key to the best result is to drain the peaches very well, whip the cream properly, let the topping cool completely, and chill the cheesecake for at least 6 hours. As a result, the dessert becomes firm, creamy, and easy to slice.
Serve this cheesecake cold with peach slices and mint leaves for a bright, elegant finish. Whether for summer meals, family gatherings, or special occasions, this no-bake peach cream cheesecake is simple, beautiful, and delicious.
Check also:
Lemon Chicken Ricotta Meatballs
Chicken and meat easy Recipes
Suggestions:
- Creamy Raspberry Panna Cotta with Fresh Berry Coulis
- Creamy Tuna Salad with Peas, Pickles and Parsley
- Creamy Sliced Beef with Mushrooms in Mustard Sauce
- Easy Gourmet Mini Burgers with Melted Cheese Recipe
- Crispy Lemon Herb Roasted Potatoes Easy Side Dish Recipe